-
Visit our website www.piratehorizons.com to quickly find download links for the newest versions of our New Horizons mods Beyond New Horizons and Maelstrom New Horizons!-
Quick links for Beyond New Horizons
- Download latest version
- Wiki - FAQ - Report bugs here - Bug Tracker on Github -

Quick links for Maelstrom
- Download the latest version of Maelstrom
- Download the latest version of ERAS II - Download the latest version of New Horizons on Maelstrom
-

Quick links for PotC: New Horizons
- Download latest version
- Wiki - FAQ - Report bugs here
-

Thanks to YOUR votes, GOG.com now sells:
- Sea Dogs - Sea Dogs: Caribbean Tales
- Sea Dogs: City of Abandoned Ships
Vote now to add Pirates of the Caribbean to the list! -
Quick links for AoP2: Gentlemen of Fortune 2
- Downloads and info
- ModDB Profile
- Forums Archive -

A Pirate Podcast with Interviews
Music, Comedy and all things Pirate!
- Episode Guide - About - Subscribe -
- Twitter - Facebook - iTunes - Android -
- Youtube - Fill the Coffers -
You are using an out of date browser. It may not display this or other websites correctly.
You should upgrade or use an alternative browser.Information aboute The New Pirate Age - Update! [WIP]
- Thread starter pirateking
- Start date
pirateking
Privateer
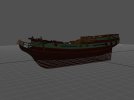
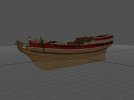
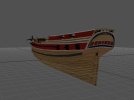
To some extent. The dark blue hull becomes light brown, the dark yellow stripe becomes red, and some of the light grey parts become white. There's not much I can do about details such as the figurehead or the big circle with the number 1 on the side, let alone the stern.Attachments
pirateking
Privateer
Ok Great perfekt, it was only about the Color Style. Thanks its perfect.Try this, then:
Index of /potc/Grey Roger/Thousand Sunny
That contains the model and texture files for the ship. You'll still need to add it to "Ships_init.c" as well as add entries in "RESOURCE\INI\TEXTS\ENGLISH\ShipModels_descriptions.txt" and "RESOURCE\INI\INTERFACES\pictures.ini". For "pictures.ini", you can copy the line for "HMS_Interceptor" and change the name in the copied line to "Thousand_Sunny", then it should have the same interface pictures as the standard ship.
Or you can get a screen shot of the ship at sea. Look at the interface pictures of other ships to see what sort of angle is suitable. (Out on open sea with no island in sight, good weather. Get a view from port/front quarter, looking slightly down on the ship so you can see some of the deck.) Then I can add it to one of the big files of ship interface pictures.
Meanwhile, I'll be doing the same for the version with the black and pale cream colour scheme to make a version of Interceptor which is more suitable for general naval use.pirateking
Privateer
First Thanks for the Ship.
@Grey Roger and @Pieter Boelen
I need you opinion!
What did you mean which Model is the best for the Character "Sanji" Vinsmoke Sanji ?
Me Idee is 9S_Nat.gm or Killer.gm Model.
If you have any other suggestions please tell it me. I am always open for new suggestions.
Cu PkIdeally you probably want to start with one of the character models who only has one eye because one of Sanki's distinguishing features is that he always has one eye covered by his hair. Simply drawing the hair over the face of a texture like "9S_Nat_a.tga" won't work because the game draws its own eyes onto the model, so he'd still show both eyes, one of them on the hair.pirateking
Privateer
Yes I know. About the eyes. That is one thing what I lose for the look like.
Hm i like more 9s_Nat because he looks more like a Gentleman.pirateking
Privateer
@Grey Roger
Please can you tell me which Position in 256 interface Portraits free is for a icon.
Down left or down Right?
There i will set in the Pics an identification Icon with the One Piece Character Icons.Any number from 567 upwards is free. There are some free numbers lower than 567, but either I or @Jack Rackham are likely to be using those.
The size 256 portraits aren't the problem, though you need to use the same number for all three sizes - 64, 128 and 256. But remember to edit "RESOURCE\INI\INTERFACES\pictures.ini", go down past the block for "FACE128_567", and add a similar block for each portrait number you use.pirateking
Privateer
Oh yes that i Know.
I plan to put a Icon on me Protraits Pics, but where can put it. Which position is free?
I think I will put it down left or down right.What is the purpose of the icon? The game automatically puts icons on the 256 picture depending on the character's job - for example, if you have an officer who is a navigator, the icon for a navigator will appear on his picture without you needing to add it.pirateking
Privateer
It is the Orginal Character Icon from One Piece.
It shows the what Character that is, hm but I also can this left away.pirateking
Privateer
@Grey Roger
Please can you me explain the Numbers in the picture.ini file?
For the Time of i make a Screenshot from the New Pirate Ship..Which bit of "pictures.ini"? If you mean the blocks which deal with size 128 portraits, e.g.:The first line is "FACE128_" plus the number of your portrait, so that if you've created "face_568.tga.tx" in various sizes, you should create a new block starting with "FACE128_568". The "sTextureName" line is the filename minus the ".tx" extension. The "wTextureWidth" and "wTextureHeight" lines just say that this is 128x128. So all you need to do is copy the entire block and change the "567" to the number of your new portrait, e.g.:Code:[FACE128_567] sTextureName = portraits\128\face_567.tga wTextureWidth = 128 wTextureHeight = 128 picture = face,0,0,128,128Code:[FACE128_568] sTextureName = portraits\128\face_568.tga wTextureWidth = 128 wTextureHeight = 128 picture = face,0,0,128,128
For ship interface pictures, it's a bit more complicated. There are now five large texture files which between them contain all the ship interface pictures, all to be found in "RESOURCE\Textures\INTERFACES". The files are "shipsBL.tga.tx", "shipsBR.tga.tx", "shipsTL.tga.tx", "shipsTR.tga.tx" and "shipsTM.tga.tx". Of those, all but "shipsTM.tga.tx" are almost full, in fact most of them are completely full. For each file, there's a block which starts:Again, "sTextureName", "wTextureWidth" and "wTextureHeight" give the name and size of the whole file. "SHIPS5" or similar match with lines in "PROGRAM\Ships\Ships_init.c" like this:Code:[SHIPS5] sTextureName = shipsTM.tga wTextureWidth = 2048 wTextureHeight = 2048You'll find a line like this for every ship listed in "Ships_init.c", and you'll find an entry for that ship under the block whose "SHIPS" line matches the one in "Ships_init.c". So, for example, look at the definition for "HMS_Interceptor", which includes:Code:refShip.BigPicTexName = "SHIPS5";Now look in "pictures.ini" and find the block which starts:Code:refShip.BigPicTexName = "SHIPS1";One part of that block is:Code:[SHIPS1] sTextureName = shipsTL.tga wTextureWidth = 2048 wTextureHeight = 2048If you use "TXConvertor" to convert "shipsTL.tga.tx" to ".tga" format so you can look at the file in Photoshop, you'll find the icon for "HMS_Interceptor" on row 7. The numbers on the 'picture = HMS_Interceptor' line give the co-ordinates for the icon within that file.Code:;row 7 picture = HMS_Bounty, 0,1537,256,1792 picture = HMS_Indefatigable, 257,1537,512,1792 picture = HMS_Interceptor, 513,1537,768,1792 picture = HMS_Unicorn, 769,1537,1024,1792 picture = HMS_Dauntless, 1025,1537,1280,1792 picture = HMS_Surprise, 1281,1537,1536,1792 picture = Hooker, 1537,1537,1792,1792 picture = PinnaceMedium, 1793,1537,2048,1792
If you look for "SP_BattleGalleon", you'll find that both "SP_BattleGalleon" and "PiratBattleGalleon" have the same numbers. "PiratBattleGalleon" has no interface picture of its own, it uses the same picture as "SP_BattleGalleon". You could do the same for "Thousand Sunny". In "Ships_init.c", give it the same line as "HMS_Interceptor", refShip.BigPicTexName = "SHIPS1"; and then in "pictures.ini", copy the line 'picture = HMS_Interceptor, 513,1537,768,1792' and change the name in the copy to match the ID you used in "Ships_init.c". Your variant should then use the same interface picture as "HMS_Interceptor".
Otherwise, you can post your version of "Ships_init.c" along with a screenshot of "Thousand Sunny" from the front and port side, and I can make an interface picture for you.pirateking
Privateer
This one:
;row 7
picture   = HMS_Bounty,                   0,1537,256,1792
picture = HMS_Indefatigable,            257,1537,512,1792
picture = HMS_Interceptor,              513,1537,768,1792
picture = HMS_Unicorn,                  769,1537,1024,1792
picture = HMS_Dauntless,                1025,1537,1280,1792
picture = HMS_Surprise,                 1281,1537,1536,1792
picture = Hooker,                       1537,1537,1792,1792
picture = PinnaceMedium, 1793,1537,2048,1792As explained above, the numbers are the co-ordinates of each ship's interface picture within the big file. For that group, the file you'd be looking at is "shipsTL.tga.tx". Use "TXConvertor" to convert it to ".tga", use Photoshop to look at that ".tga", and see if you can find the picture for "HMS_Interceptor".pirateking
Privateer
Yes. But what have I to doe if add a new pic to it.Looking at "shipsTL.tga", I can see that there's one free slot at the bottom right. In "pictures.ini", that's here, in the section just below the one for "HMS_Interceptor":Replace that last line with:Code:;row 8 picture = FR_NeptunusE, 0,1793,256,2048 picture = NL_NeptunusE, 257,1793,512,2048 picture = PO_NeptunusE, 513,1793,768,2048 picture = SP_NeptunusE, 769,1793,1024,2048 picture = Lineship47, 1025,1793,1280,2048 picture = SP_Volage, 1281,1793,1536,2048 picture = FR_Unicorn, 1537,1793,1792,2048 picture = 1793,1793,2048,2048(Replace "Thousand_Sunny" with whatever you used for the ship's ID in "Ships_init.c".)Code:picture = Thousand_Sunny 1793,1793,2048,2048
That's the easy bit. Now you need to add the picture itself. You'll need a picture of the ship from the forward port quarter. Have a look at the thread about my new version of the "Interceptor", which contains the screenshot I used for that ship's interface picture:
Generic version of "HMS_Interceptor"
That will give you some idea of what sort of screenshot you need. (Look at the front view, not the back view.) Get a similar screenshot of your ship, in good weather, on open sea with no island in view. Copy a square area around the ship, paste it to a new file, resize that to 256x256, then copy and paste that to the bottom right of "shipsTL.tga".
To get the faded edges, use the "Rectangular Marquee Tool". Set it to feather 4 pixels. Use it to select areas around the edge of the picture, then clear those areas, leaving a faded black border which should end up looking like the other pictures.
Now find the "Channels" tab. If it's not present, click on the "Windows" menu and select "Layers". In "Channels", you should see five sections: "RGB", "R", "G", "B" and "Alpha". Normally the first four are selected so you see the picture itself. Click on "Alpha" and you should now see a white screen with a black box at the bottom right. The Alpha channel can mask out areas of the picture to make them appear transparent, and at the moment the bottom right is masked because there wasn't a picture there. Change that area from black to white so that your new picture will not be masked. Save the whole lot back as "shipsTL.tga", then use "TXConvertor" to convert it back to "shipsTL.tga.tx". Set "TXConvertor" to use the setting "A8R8G8B8 - 8 bit alpha, 24 bit color" before doing the conversion.pirateking
Privateer
Ah ok. Where can I download the Texture with the black Hull.


