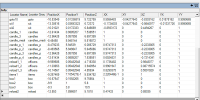
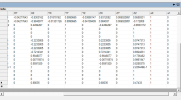
The link was missing. Try this:
Locators with the TOOL
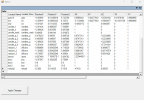
Another useful trick with TOOL is to write locators to a text file. When you have loaded the locator file, look at the "Locators" tab":
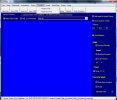
"Write to File" dumps all the locator information into a text file. "Read from File" reads the locators from a text file into the current model. This gives you a way to see your new locator. (And also to put your new locator right under an existing "Reload" locator, rather than right at the end of the file.)
The problem: the model file and the locator file are separate. If you load the model file into GM Viewer, you won't see locators. If you load the locator file into GM viewer, you won't see the model.
The solution: read the locator file into TOOL, use "Locators -> Write to File" to dump the locators. Read the model file into TOOL, use "Locators -> Read from File", and save the result as a completely new file - this one will work in GM Viewer and let you see the model with the locators, but will probably not work in the game, so don't overwrite the existing model file! If the original model is "mine.gm" then I'll save this version as "mine_with_locators.gm".
Read this one into GM Viewer, switch on locators and locator names, now you can see where all the locators are on the model. Add your new locator to this file, change the co-ordinates, save it, look at it again with GM Viewer and see where your locator has appeared. Change the co-ordinates, save it again, look at it again with GM Viewer - repeat until the locator is where you want it.
Dump the locators to the text file, load the original locator file, read the new locator from the text file, and save it back as the locator file - or, for preference, save it as a new locator file as suggested in section 7B of the tutorial. (This is particularly important if you are modifying the tunnels on Nevis because they play a crucial part in the "Hornblower" storyline, so leave the original tunnels as they are!)


