-


Visit our website www.piratehorizons.com to quickly find download links for the newest versions of our New Horizons mods Beyond New Horizons and Maelstrom New Horizons!-

Quick links for Beyond New Horizons
- Download latest version
- Wiki - FAQ - Report bugs here - Bug Tracker on Github -

Quick links for Maelstrom
- Download the latest version of Maelstrom
- Download the latest version of ERAS II - Download the latest version of New Horizons on Maelstrom
-

Quick links for PotC: New Horizons
- Download latest version
- Wiki - FAQ - Report bugs here
-

Thanks to YOUR votes, GOG.com now sells:
- Sea Dogs - Sea Dogs: Caribbean Tales
- Sea Dogs: City of Abandoned Ships
Vote now to add Pirates of the Caribbean to the list! -

Quick links for AoP2: Gentlemen of Fortune 2
- Downloads and info
- ModDB Profile
- Forums Archive -

A Pirate Podcast with Interviews
Music, Comedy and all things Pirate!
- Episode Guide - About - Subscribe -
- Twitter - Facebook - iTunes - Android -
- Youtube - Fill the Coffers -
CryEngine - Maya "CLOTH 1" - Merged Mesh Deform
- Views Views: 1,026
- Last updated Last updated:
-
This tutorial will be updated regularly! (23. May 2014)
In Cryengine you have two ways to setup physical interacting cloth. In this tutorial I will show how to setup the new "Cloth Merged Mesh Deform" variant of it. This technique need much less performance then ENTITY Cloth and is "the" recommend method for static content.
The price for this cheap technique is, that it is actual only useable at static objects. The next update CE 3.6. should bring an relevant update here.
"Cloth Merged Mesh Deform" actual can be good use as ingamecontent like static flags or some other curtains, hanging, carpeting or sails for static ships, fixed in a dockyard etc.. There are many options to use this technique.
To create it in Maya, you have two ways:
1. You can create only the cloth
2. You can create the cloth together with the static mesh you need (for example: cloth = flag, rest of mesh = flagpole)
To understand how "Cloth Merged Mesh Deform" works, I show first variant 1, how to setup this system to get it working ingame.
At first you need your mesh which should be "cloth". At this you paint black vertexcolor at all static areas of this mesh and white vertexcolor to all moveable vertices. Grey vertices get affected by the stiffness and white vertices are deformable without any stiffness. Notice this, when you paint your mesh.
Create a very small helpermesh, that you can hide in your geometry, at the position where you want to attach this cloth. Or you make it so small, that you can hide it at the mesh itself. In my example I have scaled this helpermesh big, that you see what I mean. "Cloth Merged Mesh Deform" wont work without this helpermesh.
In the Materialeditor you need only one material. THIS, you can assign to both meshes (your cloth and the helpermesh).
In this screenshot you see the finished setup:
PICTURE
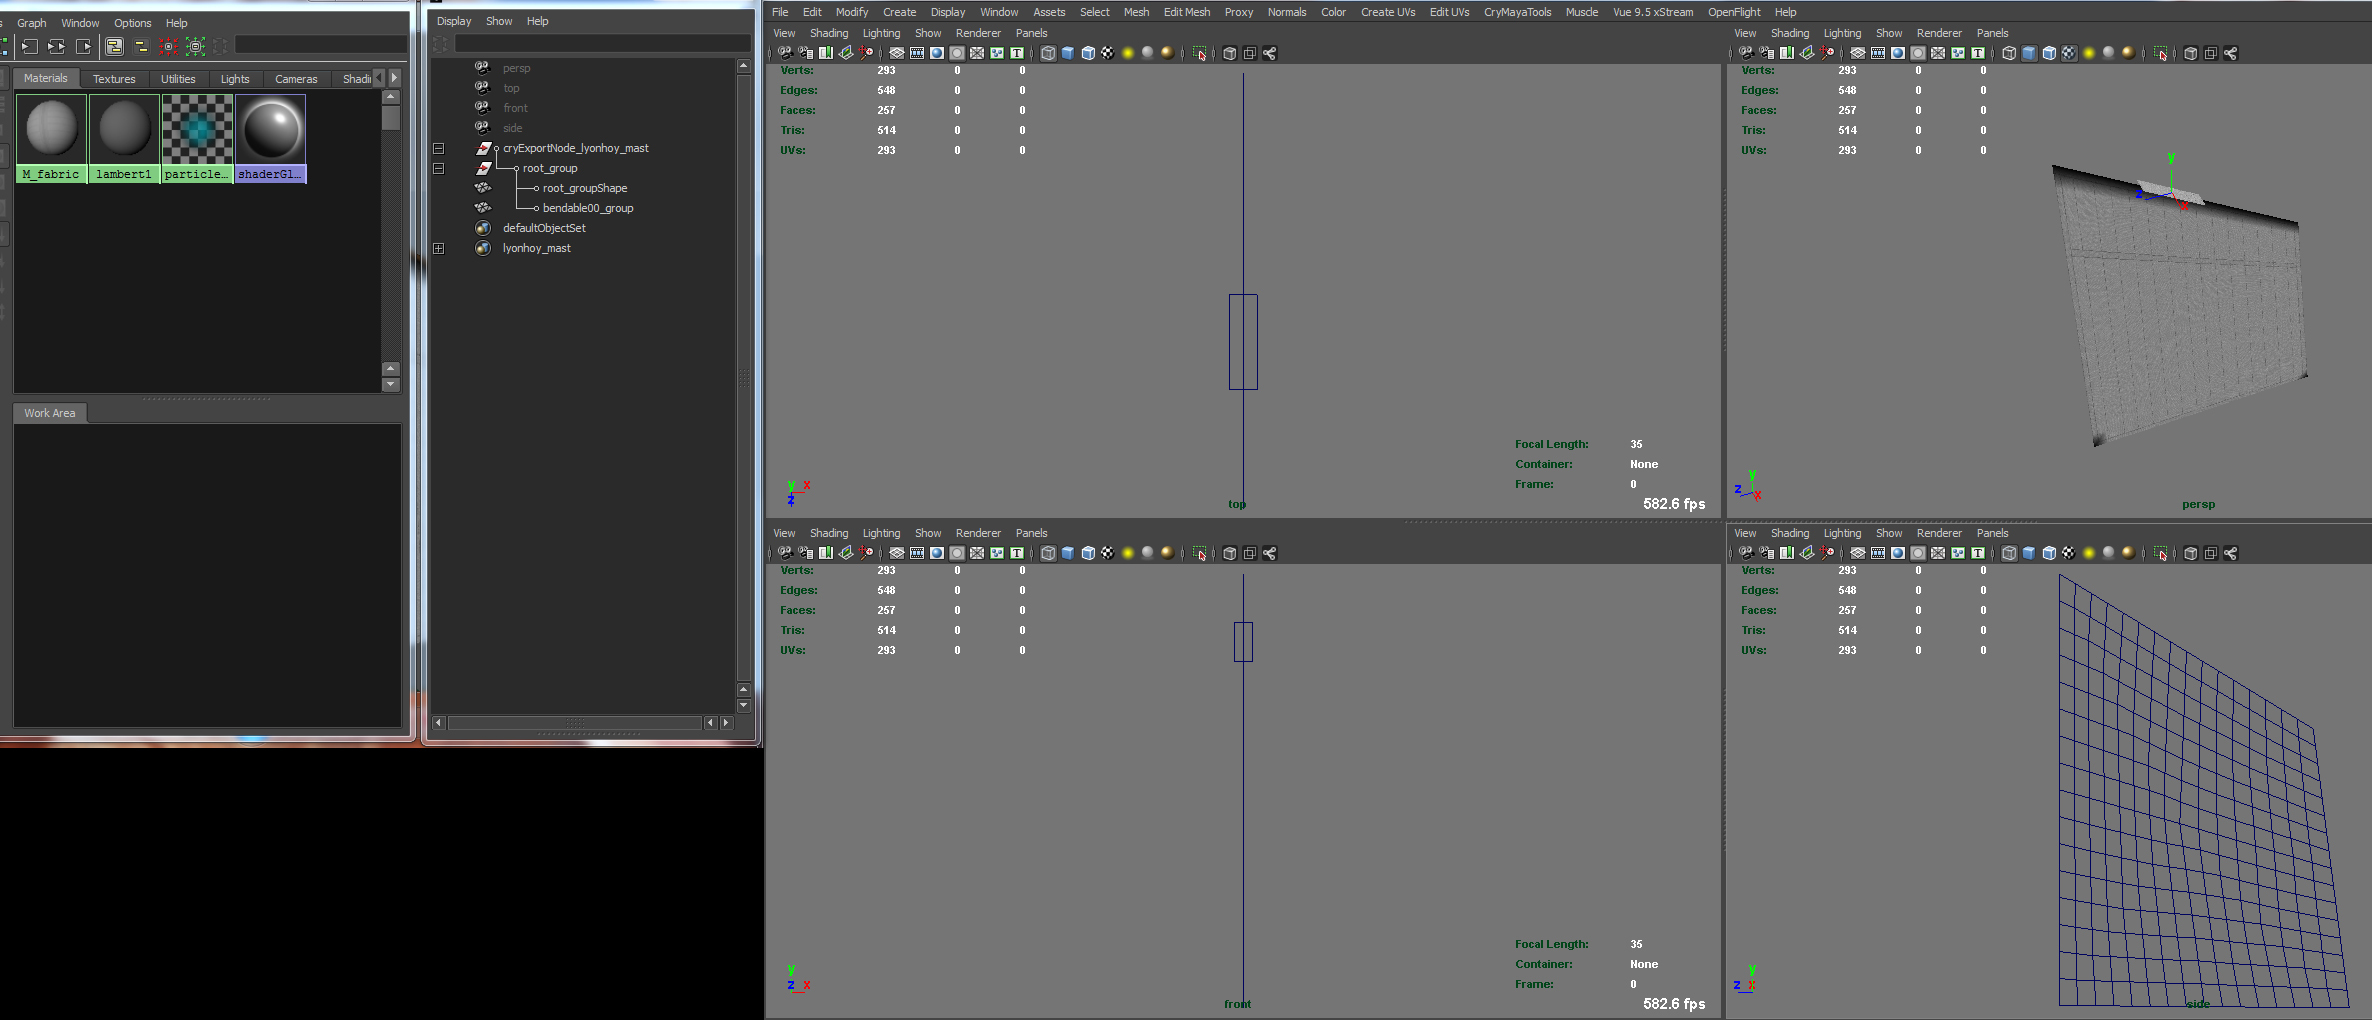
To understand the hierarchy, here the assignment of the geometry. "bendable00_group" is in this case our cloth-mesh. Yes, the mesh need the suffix "_group" to work right.
PICTURE
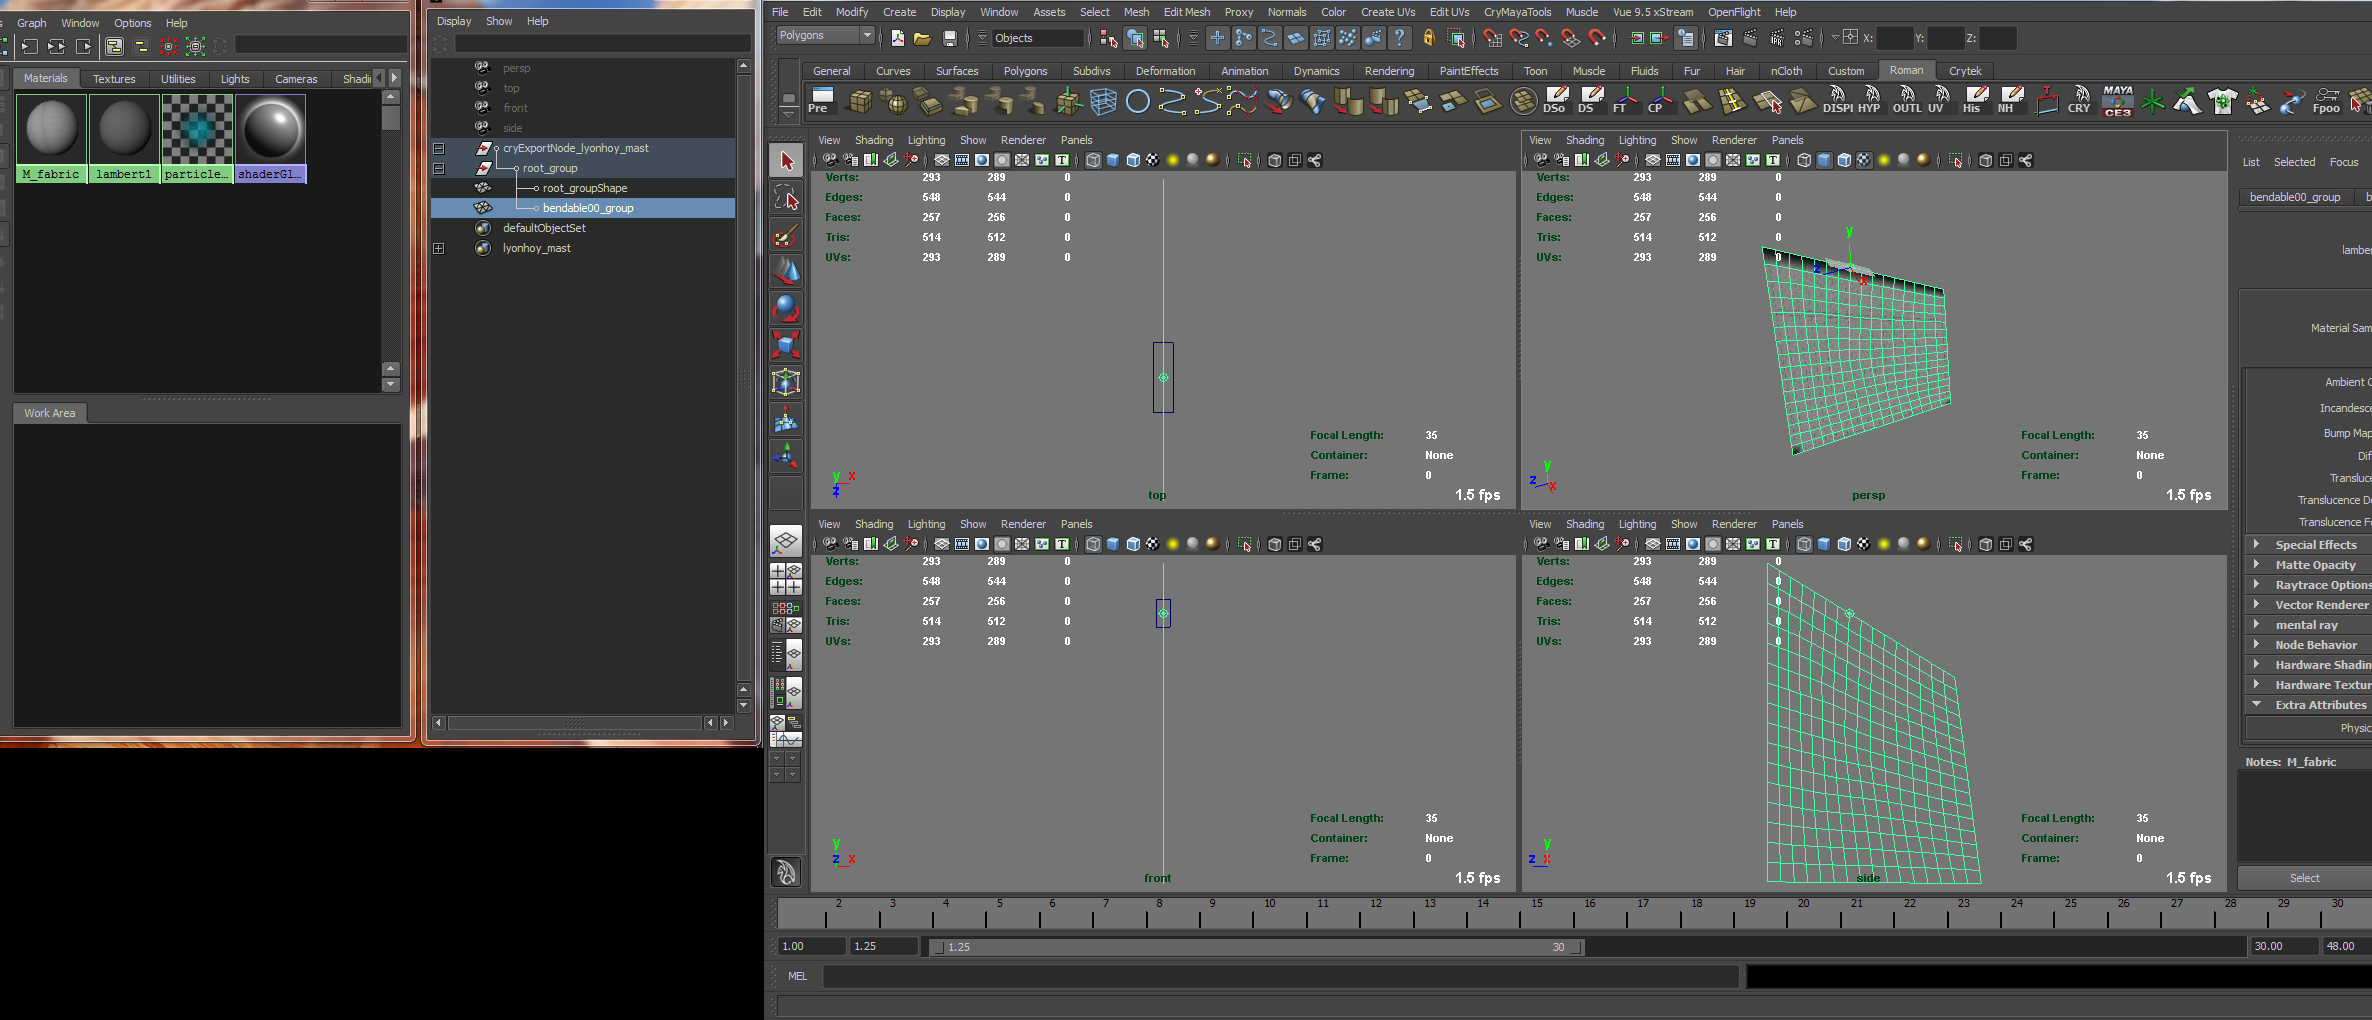
IMPORTANT:
Please set the material-CryShader-physical flag as default and use NO physical proxy in this scene!
PICTURE:
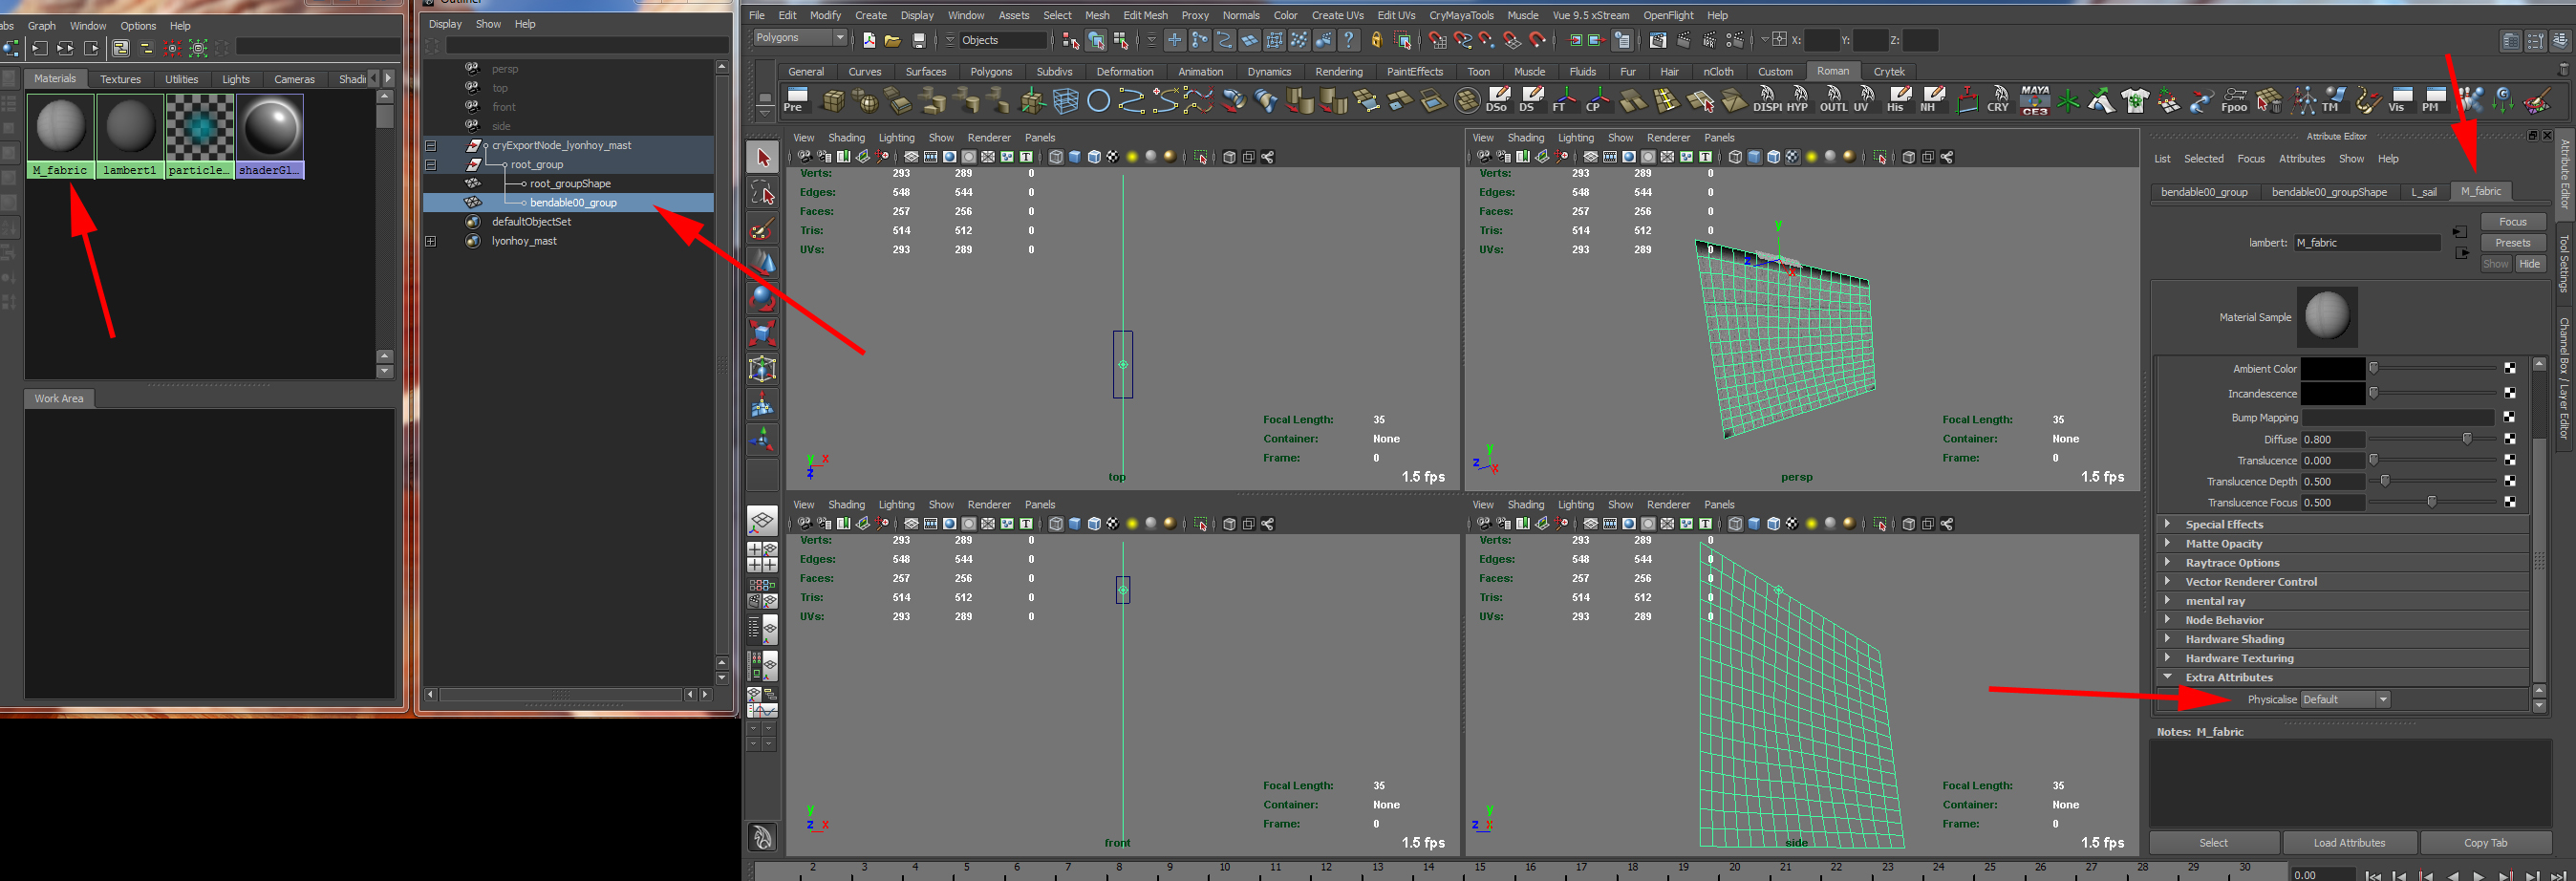
Here you see the helpermesh, I have spoken about:
PICTURE:

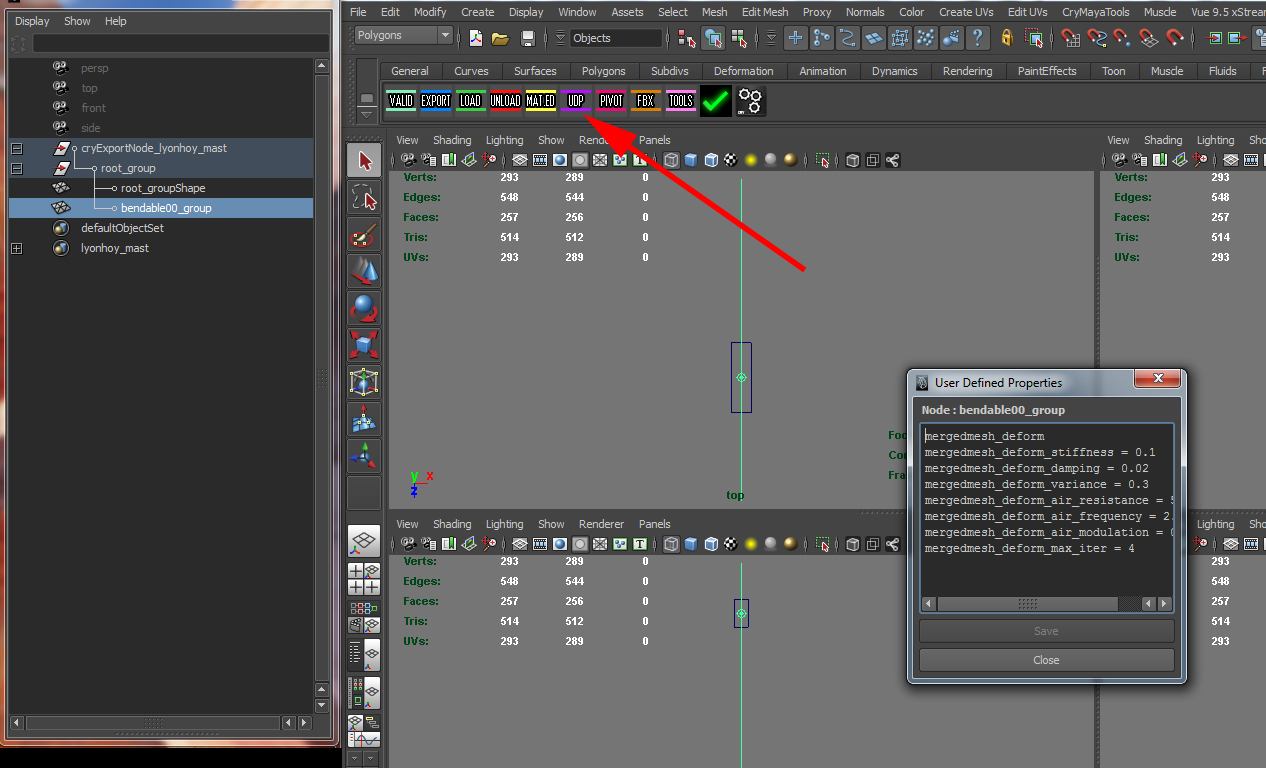
Highlight now the cloth (bendable00_group) and open in the Crytools the "UDP" editor (User Defined Properties). In this small window, you add the variable, the CryEngine should take to animate the cloth:
This example-values comes from the Crytek-DOCs:
mergedmesh_deform
mergedmesh_deform_stiffness = 0.9
mergedmesh_deform_damping = 0.1
mergedmesh_deform_variance = 3
mergedmesh_deform_air_resistance = 0.3
mergedmesh_deform_air_frequency = 1.67
mergedmesh_deform_air_modulation = 0.03
mergedmesh_deform_max_iter = 4
And this, I found in the MAX-Samplefile (values working good as flag):
mergedmesh_deform
mergedmesh_deform_stiffness = 0.1
mergedmesh_deform_damping = 0.02
mergedmesh_deform_variance = 0.3
mergedmesh_deform_air_resistance = 5
mergedmesh_deform_air_frequency = 2.07
mergedmesh_deform_air_modulation = 0.03
mergedmesh_deform_max_iter = 4
PICTURE:
When you dont know how to setup the "CryExportnode", then use at you scene first the "Tools"-button and create an CryExportnode. Only this node contains important exportvalues. At the "root_group" you can change in name.
The next step is to create with the Crytool "Material Editor" our material group. Highlight inside Outliner the CryExportNode and open the Crytool "Material Editor". Hit then "Create Group from Selection" and your materialsetup will be right shown. After create it, you can close the editor.
PICTURE:
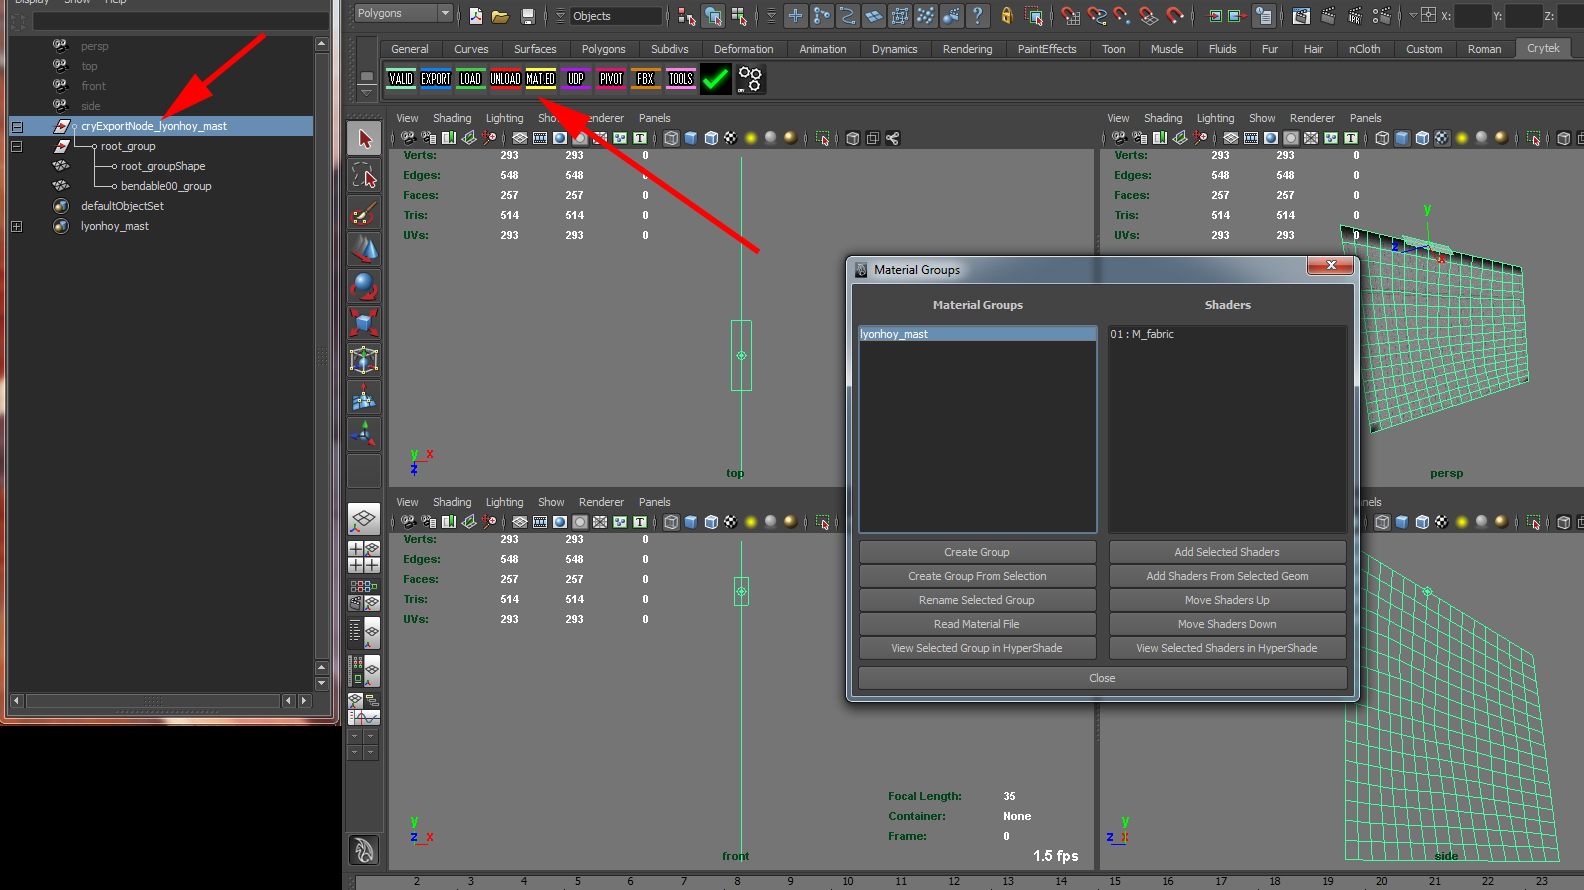
Last but not least you can export your scene for use in CryEngine. Please take the exportersettings like the pictures is showing:
PICTURE:
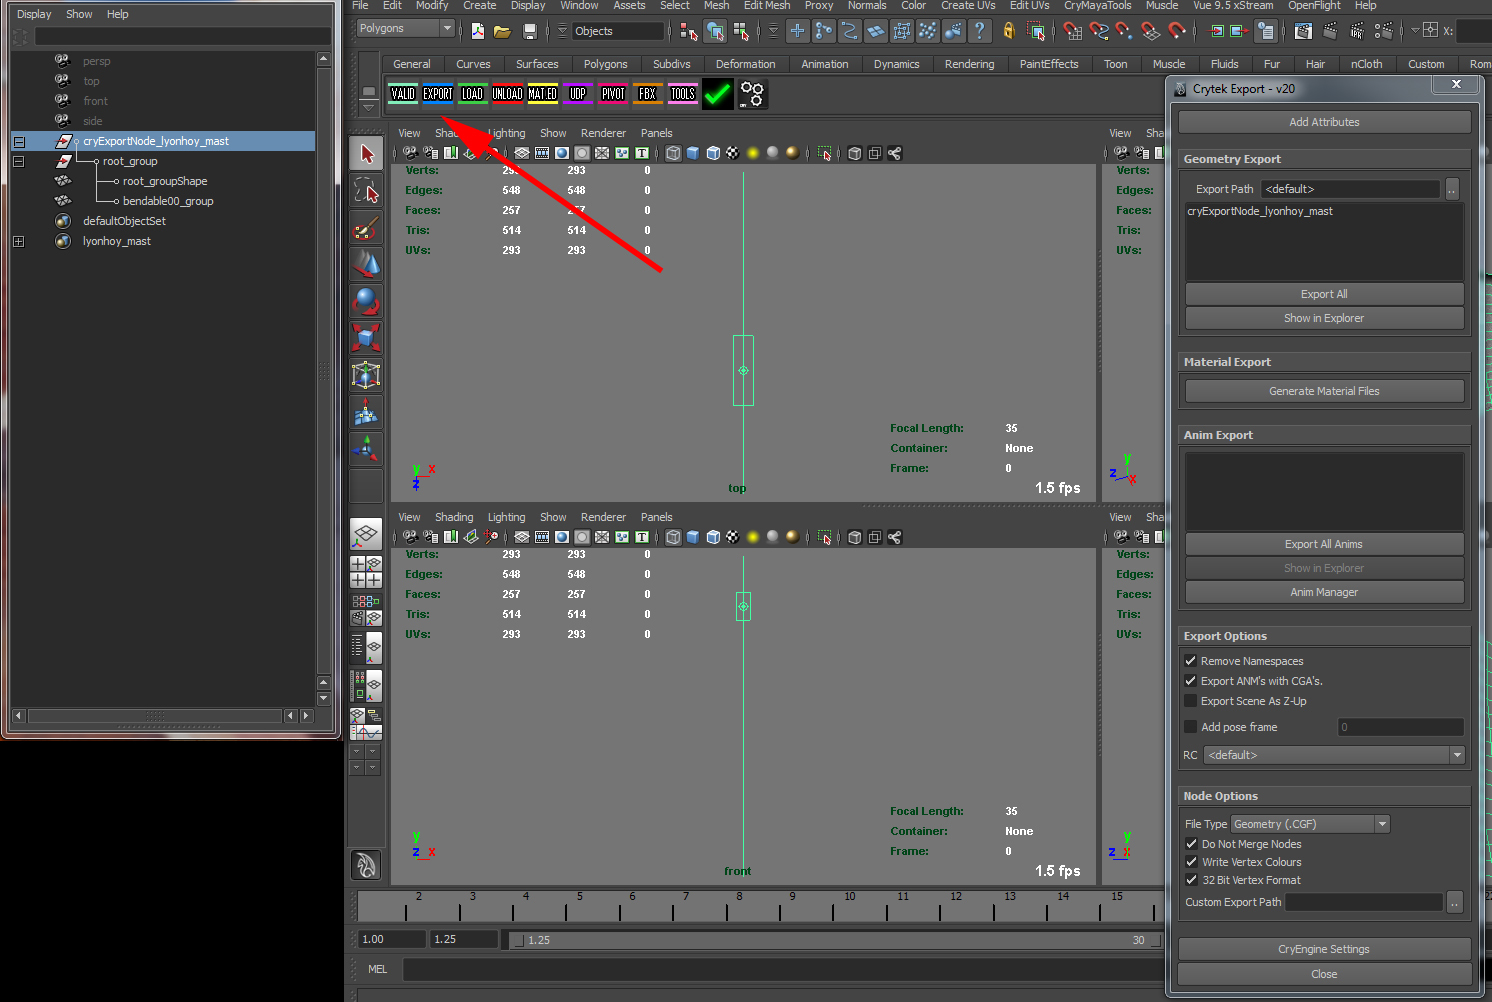
>>>>>>>>>>>>>>>>>>>>>>>>>>>>>>>>>>>>>>>>>>>>>>
When you put this setup inside a mesh group, like my option 2 says
"2. You can create the cloth together with the mesh you need (for example: cloth = flag, rest of mesh = flagpole)"
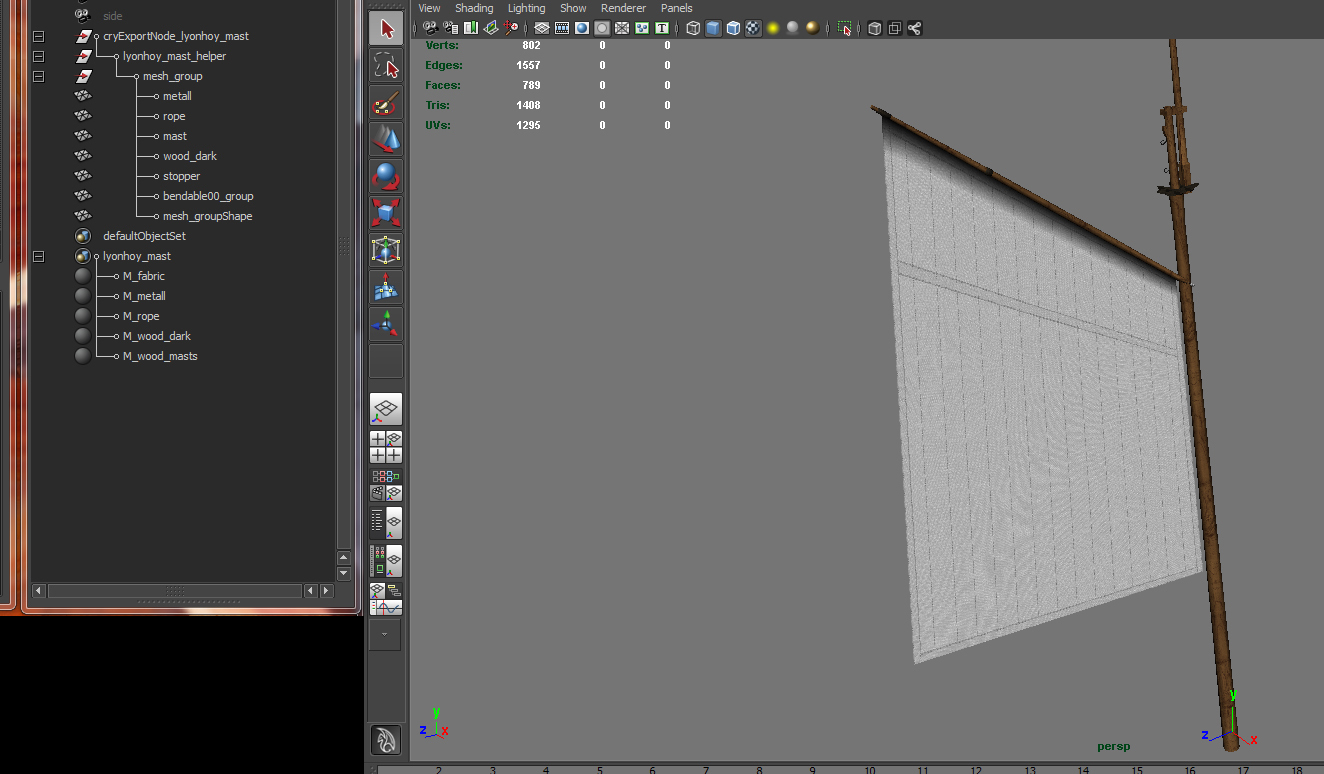
you need to setup the scene similar to this scene:
Note the naming of the groups etc.. It shows the way of variable naming to the first example.
Important is in this case, that you need to flag ALL meshes inside the scene with the material-CryShader-physical-flag as default and use NO physical proxy in this scene! Use this system wise because physical proxys are goodand often need for performance! A simple flagpole isnt the problem but a whole construction is not effective. Sort what you need, thats my suggestion.
PICTURE:
Here you see the Crytool Material Manager, for understanding its setup for this example:
PICTURE:

-RD


