
-


Visit our website www.piratehorizons.com to quickly find download links for the newest versions of our New Horizons mods Beyond New Horizons and Maelstrom New Horizons!-
Join our discord server for regular podcasts/AMA about upcoming and released pirate games (Caribbean Legend, Corsairs Legacy, Ahoy, ERAS 2, etc.):

-

Quick links for Beyond New Horizons
- Download latest version
- Wiki - FAQ - Report bugs here - Bug Tracker on Github -

Quick links for Maelstrom
- Download the latest version of Maelstrom
- Download the latest version of ERAS II - Download the latest version of New Horizons on Maelstrom
-
Join PiratesAhoy! on our social channels:


-

Quick links for PotC: New Horizons
- Download latest version
- Wiki - FAQ - Report bugs here
-

Thanks to YOUR votes, GOG.com now sells:
- Sea Dogs - Sea Dogs: Caribbean Tales
- Sea Dogs: City of Abandoned Ships
Vote now to add Pirates of the Caribbean to the list! -

Quick links for AoP2: Gentlemen of Fortune 2
- Downloads and info
- ModDB Profile
- Forums Archive -

A Pirate Podcast with Interviews
Music, Comedy and all things Pirate!
- Episode Guide - About - Subscribe -
- Twitter - Facebook - iTunes - Android -
- Youtube - Fill the Coffers -
CryEngine - Attachments to modells
- Views Views: 538
- Last updated Last updated:
-
This tutorial will be updated regularly! (6. Feb 2014)
Inside CryEngine you have more the one way to attach parts to another part. In this tutorial I describe the most used method with attachment-helpers and little codework inside the XML for -in this example- an vehicle.
So the CryEngine can place an attachment, its need first to place an attachment-helper inside Maya (my tutorials based on Maya).
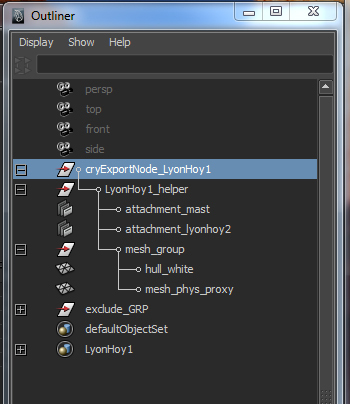
You see at the picture below the structure of the hierarchy. The attachment-helper should named "ATTACHMENT_NAME". In my example is "attachment" clearly and after the "_" my name "mast" and after the 2nd attachment-helper "lyonhoy2" for the CGF-part of the ship. Needs your ship more attachments then place similar inside the hierarchy and name for right assignment correctly.
Remember: To make a ship work its need, to setup one part (I mostly use the underwater-hull) plus the physical proxy in an CGA - format. CGA can only handle one part with LODs, so I hold the standrad to only setup one part in a CGA. The rest of the ship we export as CGF. This CGF need to be attached to the ship. Here we fit in this "attachment-theme".
Picture:
You see here the helpers and my both meshes. "hull_white" is the underwater hull and the "mesh_phys_proxy" the physical proxy (remember = for the whole ship).
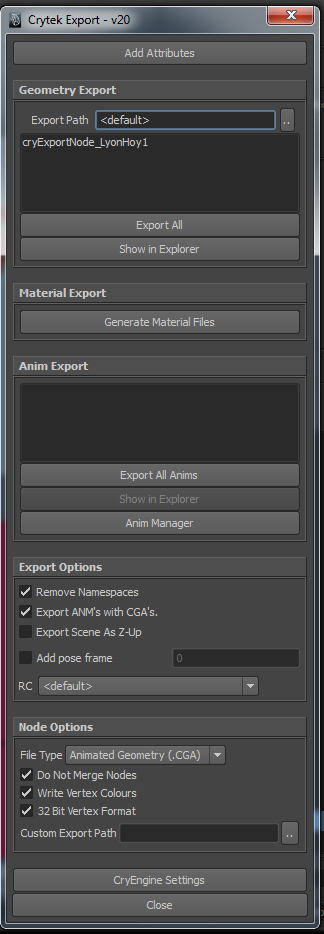
Now, for the export of this modell is need to know, that we here export the lyonhoy1 - CGA modell! The exportsettings should be:
Picture:
Now we need to switch to the vehicle-xml. NOTE: How to create an xml and for what, I describe in another tutorial. A few the programmparts Captain Murphy is programming, so I only want to point actual, how to setup in this way attachments.
A few very simple code-segments need to tell the engine what parts should connect with the attachment-helpers, we placed in Maya.
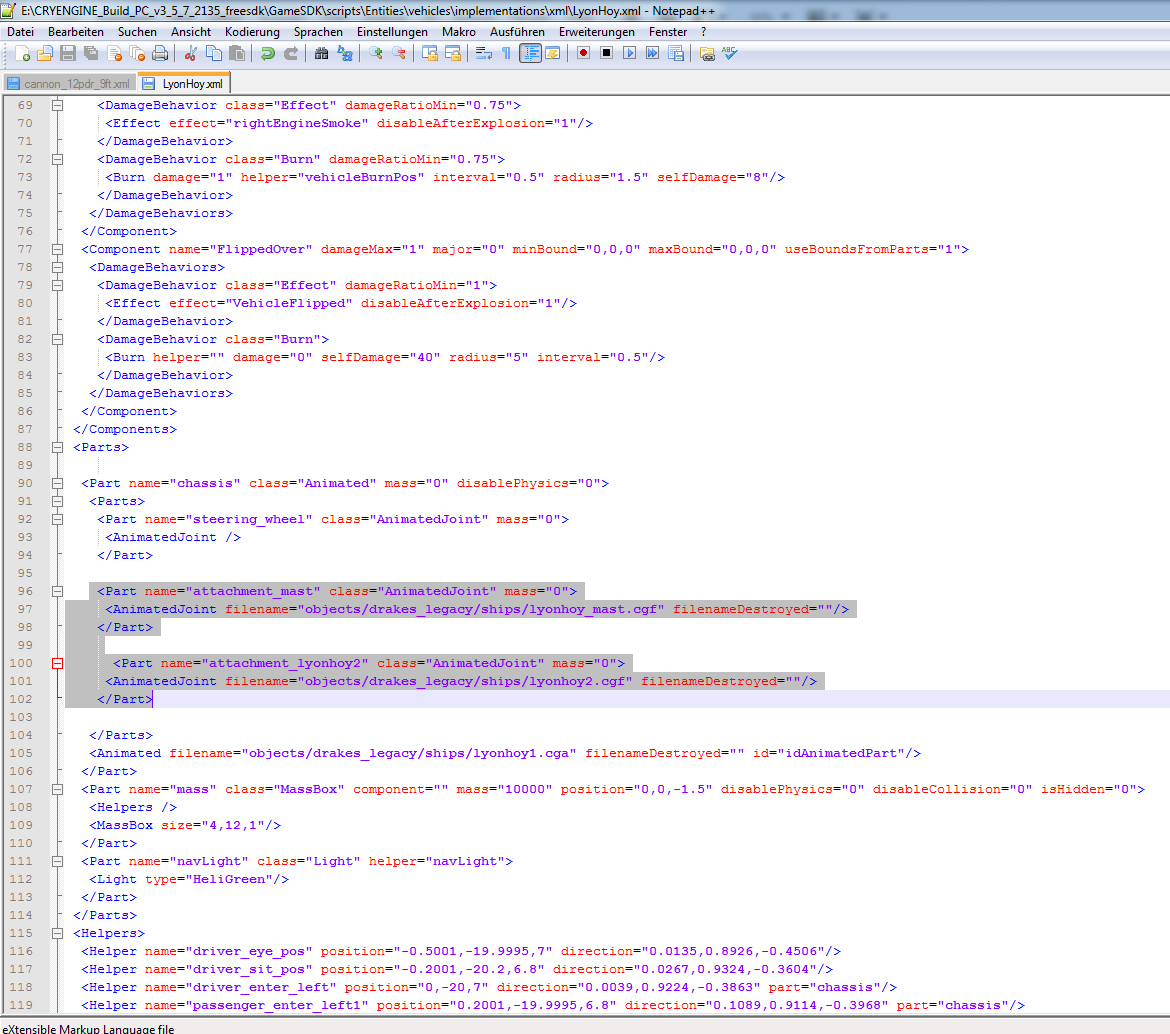
The vehicle-xml is placed in the root: Scripts/Entities/Vehicles/Implementations/Xml
Here a picture: You see the highlighted segments for the two attachment-helpers inside the <PART> - block. This block starts at the position I insert a blank line above the "chassis"-entry. The next two blank lines separate for better view the new (highlighted) entrys:
Save and close the file after editing (I recommend the Notepad++ for editing an XML-file).
Picture:
(Note, that the path is case sensitive and should be right)
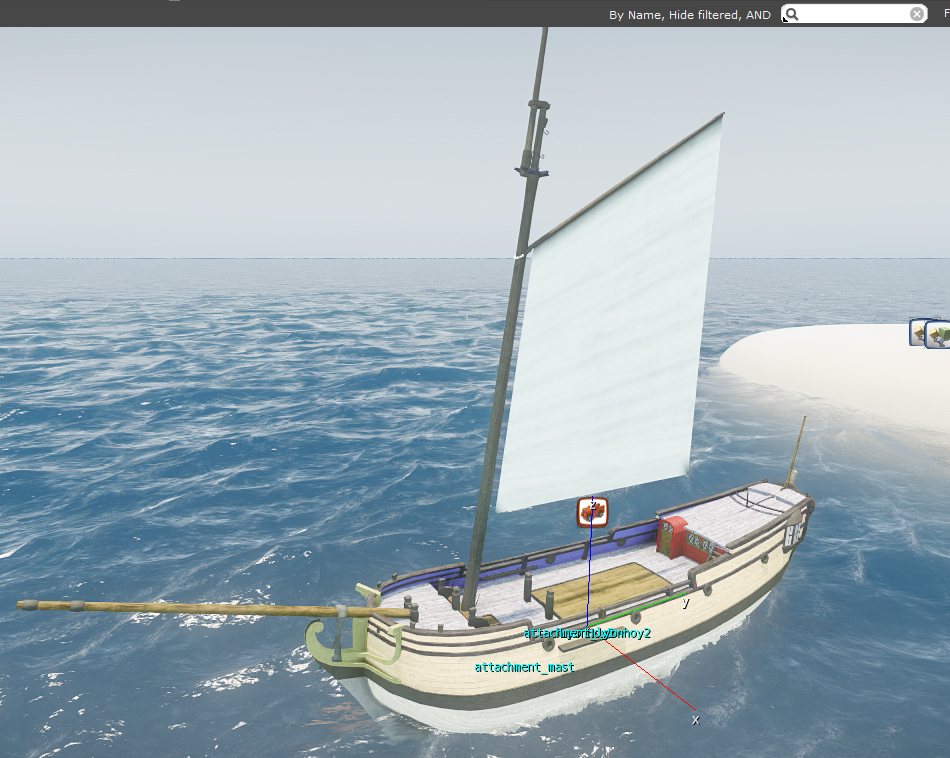
After loading the free SDK and placing the ship you see, that is not only the underwaterhull from "lyonhoy1.cga". Now, the ship is complete. This situation show us, that the attachments and the entrys inside the vehicle-xml works right. The already exported "mast" and "lyonhoy2.cgf" is required to make this work!
Picture:
(The debug screen of the attachments you get by typing "e_debugdraw 15" in the console)
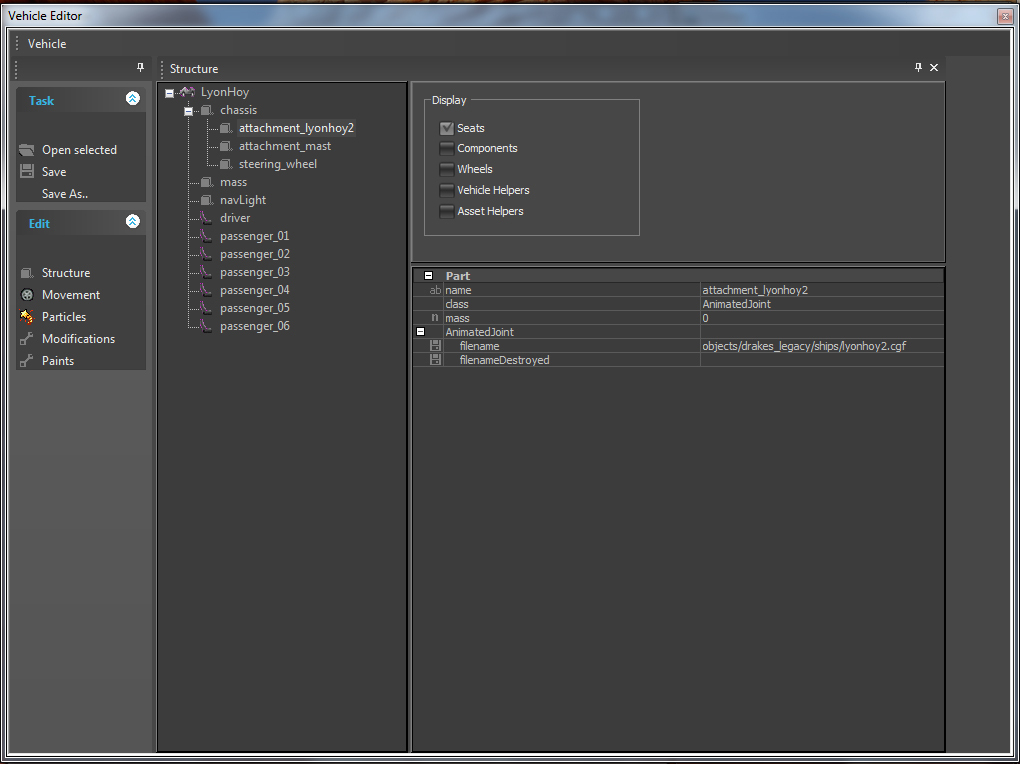
To reduce future work inside the XML, you can open now the vehicle-editor because the required entrys for the both new attachments inside the XML are already done.
Picture:
You see, that you can place a damaged mesh too and that the attachment-helpers are already placed below the "chassis" entry. Info: When you turn the "asset-helpers" and "vehicle-helpers" displayoptions on then you see the attachment-helpers two times because the physical helpers (the placed helpers inside Maya) will then shown at the main root of the vehicle hierarchy too.
-
