
-


Visit our website www.piratehorizons.com to quickly find download links for the newest versions of our New Horizons mods Beyond New Horizons and Maelstrom New Horizons!-
Join our discord server for regular podcasts/AMA about upcoming and released pirate games (Caribbean Legend, Corsairs Legacy, Ahoy, ERAS 2, etc.):

-
Quick links for Beyond New Horizons
- Download latest version
- Wiki - FAQ - Report bugs here - Bug Tracker on Github -

Quick links for Maelstrom
- Download the latest version of Maelstrom
- Download the latest version of ERAS II - Download the latest version of New Horizons on Maelstrom
-
Join PiratesAhoy! on our social channels:


-

Quick links for PotC: New Horizons
- Download latest version
- Wiki - FAQ - Report bugs here
-

Thanks to YOUR votes, GOG.com now sells:
- Sea Dogs - Sea Dogs: Caribbean Tales
- Sea Dogs: City of Abandoned Ships
Vote now to add Pirates of the Caribbean to the list! -

Quick links for AoP2: Gentlemen of Fortune 2
- Downloads and info
- ModDB Profile
- Forums Archive -

A Pirate Podcast with Interviews
Music, Comedy and all things Pirate!
- Episode Guide - About - Subscribe -
- Twitter - Facebook - iTunes - Android -
- Youtube - Fill the Coffers -
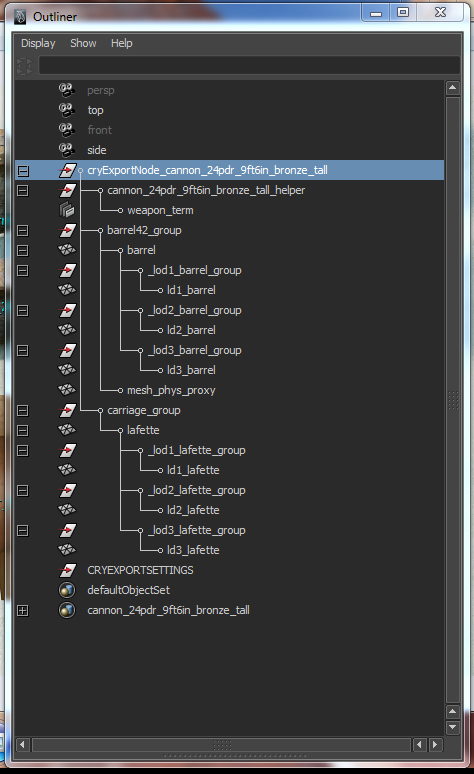
(3a) CryEngine - CGF setup Maya
- Views Views: 604
- Last updated Last updated:
-
This tutorial will be updated regularly! (5. May 2014)
The CGF (static geometry) can store helpers like the CGA (animated geometry). The attention in hierarchy research is, that more then one hierarchy works in any way. What is missing, you notice most later. THIS hierarchy here solve for CGF all requirements.
To debug its correct working, use the concole commands:
e_debug_draw 15 -> Debug draw the helpernodes
e_debug_draw 1 -> Debug draw the LODs
p_draw_helpers 1 -> Debug physical proxys
Place for fast LOD-switching your assett in the map and set its LOD-range to 255.
PART 1a - Standardsetup
At first the hierarchy inside Maya, to get the modell correct working. In this example you see the way to create one modell that consists two submodells but only one proxy. The proxy contains in this case the whole physicalmesh for all parts togehter in one part. Mostly recommend at static objects.
HIERARCHY:
PICTURE
Need your modell some helpers (in 3DSMAX called "Dummys"), then create an helpernode (here, in this example "weapon_term"). Use the option from the CryExport-shelv:
PICTURE

Here in one picture the visual overview what the hierarchy at the first picture means. The left red part is the physical proxy. Note: The proxy that is for the whole modell, can be placed in any part group. In our example it is placed below the "barrel group".
Then you see at the right side the rendermodell that consists of two submodells. Every submodell have its own group and its own LODs.
PICTURE
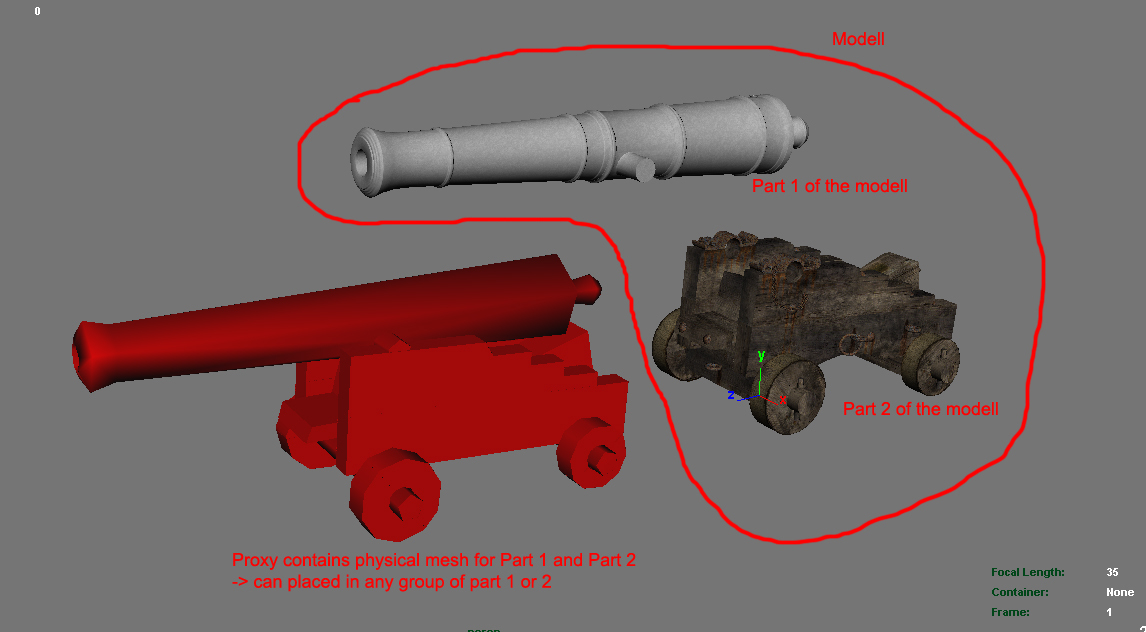
Now we come to the bad side of this simple setup. There is one thing you need to know: When you combine the physical proxy to only ONE but you have more then ONE submodell, you can get only physical impacts to the material or its damaging effects of the submodell where the physical proxy is placed below. In our example means this: The barrel have for example bullet impacts at its surface, the carriage not.
The reason why I show you this simple method first is, that you understand how the system works!
Note, that every group below the CryExportNode cant have polycounts larger then 65.535 triangles. Depending of its density sometimes various limits earlyer can be hit.
When you understand the Basic guidlines right you know, that you need to organisate the submodells per material. When ever you reach borders of polycounts larger then 65.535, think about a wise split of this modell into an next submodell with the same material.
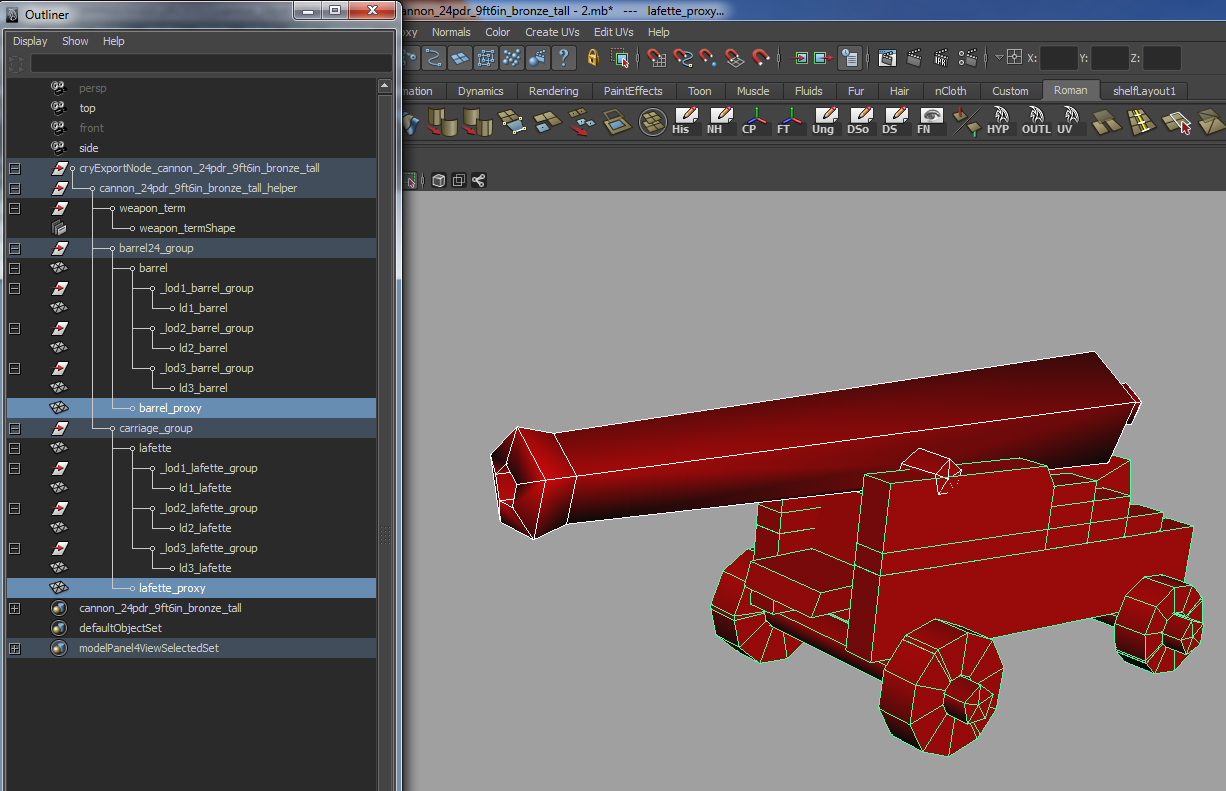
PART 1b - Standardsetup
Based of my last section, I will show you here the right setup of the modell with two submodells and proxys:
PICTURE
When you remember the basics of modelling right, you know that every LOD-step reduce the polycount of the modells. Often, in official DOCs or in forums, you find the naming "LOD 0". What this means, here the overview:
LOD0 = rendermesh (the mesh you see ingame at the close distance = your high poly modell)
LOD1 = LOD1
LOD2 = LOD2 .. .etc.
"XYZ"_Proxy = physical proxy
NOTE: Create the physical proxy with so less polycount you can, to cover all important shapes of your modell. A good way is often to use the lowest LOD-stages. BUT IMPORTANT: Thing ever about enviroments interaction with your assett! When you close a hole, things cant pass it in rendermesh. When you give a 16 edges drum an only 4 edges proxy, the drum cant roll a ships deck!
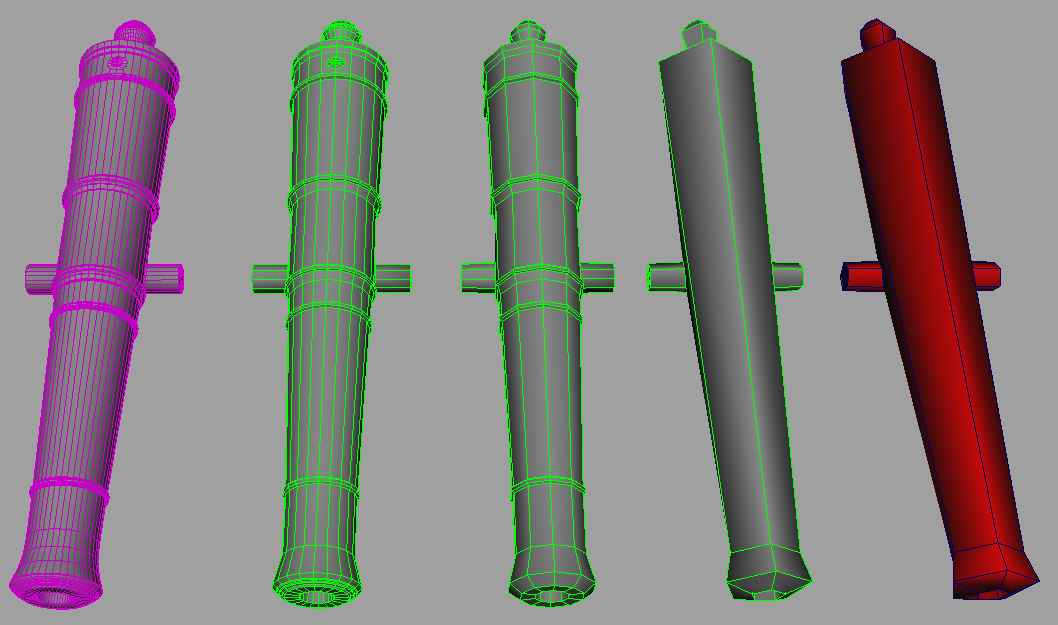
Example of LOD-stages, based of the cannon example:
Purple = rendermesh
Green = LOD1, 2 & 3
Red = physical proxy
PICTURE
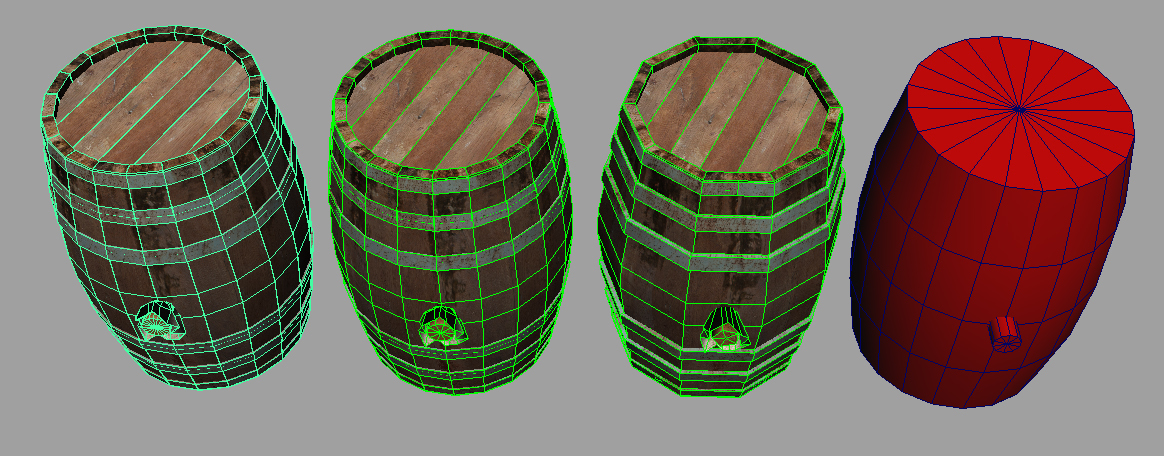
Here you see the same example with a barrel (drum). Please look exactly at the picture.
The LOD-stages reduce the polycount AND the edgeloops in scope around BUT the physical proxy do have the original edgeloops in scope around because its important when the barrel interact (rolling) with the enviroment.
PICTURE
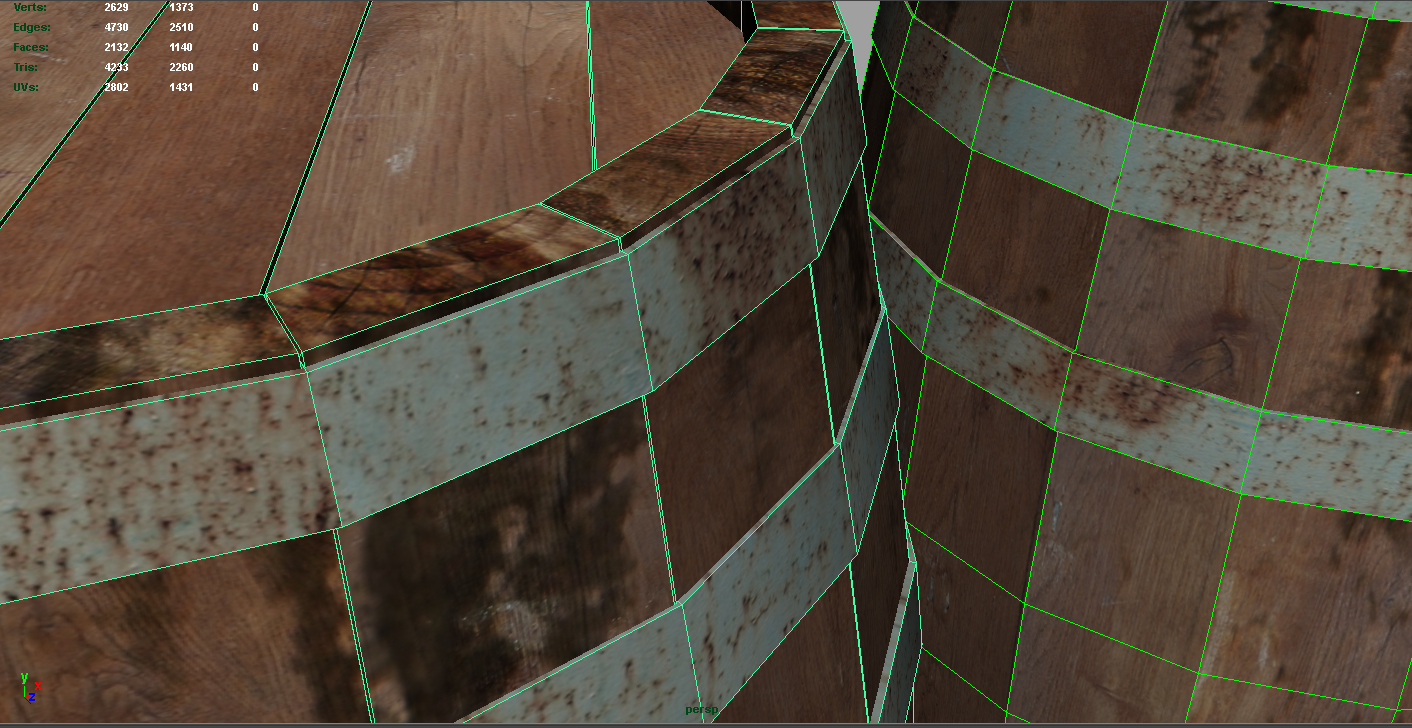
The difference between the rendermesh and LOD1 is hard to see in the first screenshot. Please look for this, here at the second one, if you are interest in the reduce of polycount. The small details, like the separate wooden pieces of the barrel you only see ingame when you are close to the modell. This, is the first, I reduce in LOD1. The result is close to the half of the polycount:
PICTURE
PART 2 - Important when you are creating very large Modells
very detailed gameworlds need detailed enviroment and this results in modells with high polycounts. For this, a wise way of economical setup is need because you want the best look but its most effective handling in the CryEngine! The latest knowledge in handling big modells is that you first need to plan ever to place subparts of the modell in groups (I call it "units") and setup for each of it the LODs and a physical proxy.
The exportable polygonlimit I havent reached at the moment but around 300.000 is possible. I will test around with this and edit the limit, when I found one.
IMPORTANT: To export modells with polycounts more then 65.535, you need to use CryEngine 3.5.8. or higher! The rc.exe (ressource compiler) from this version is able to export bigger polycounts!
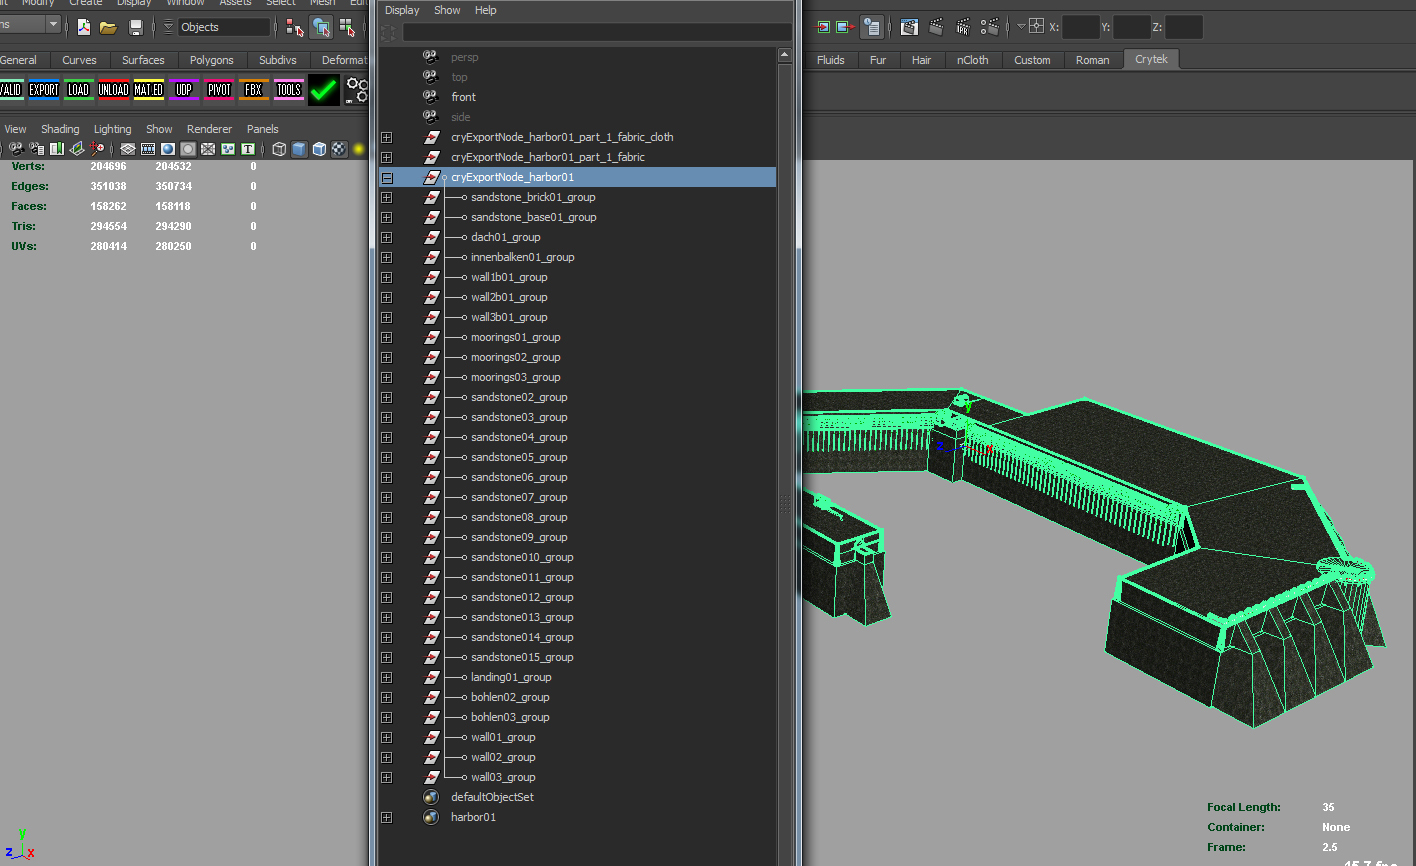
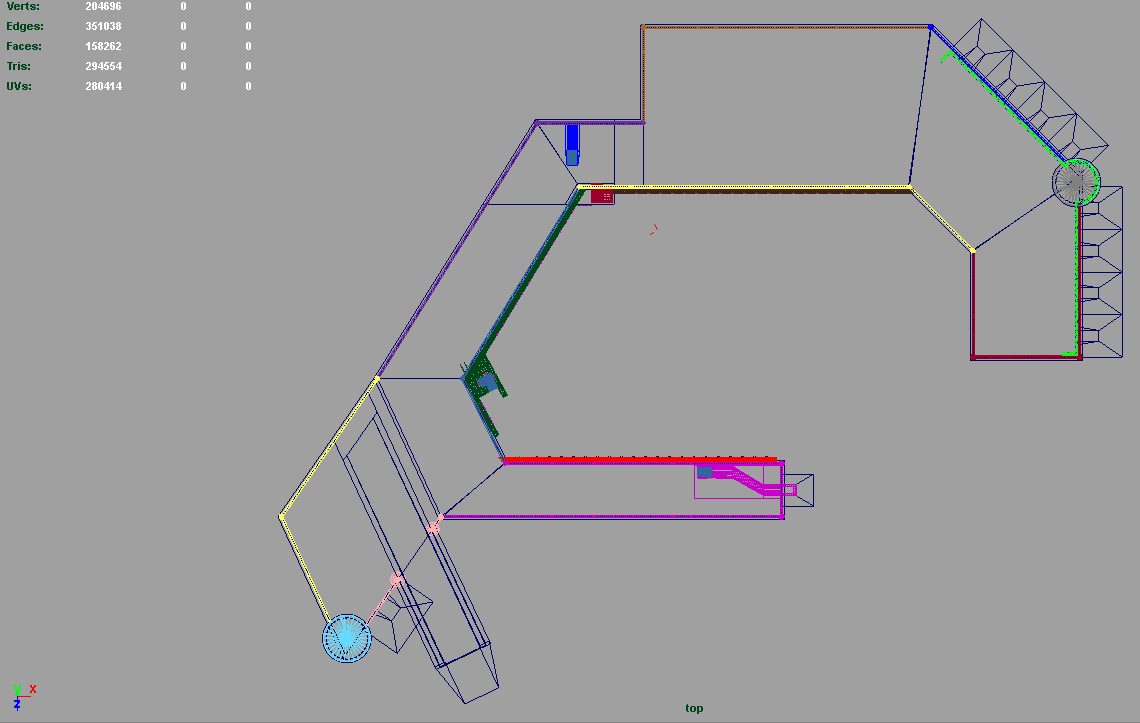
Here two screenshots as first overview. I use my first harbor as example because it have two important circumstances we need to research ingame:
1. A harbor is big in size
2. A harbor is big in polycount
You see only one cryexportnode but with many groups below. This groups are called "units" or "submodells" of the whole modell. I have only separated 2 exportnodes for clothtest at the harbor, please ignore this both groups for now.
PICTURE
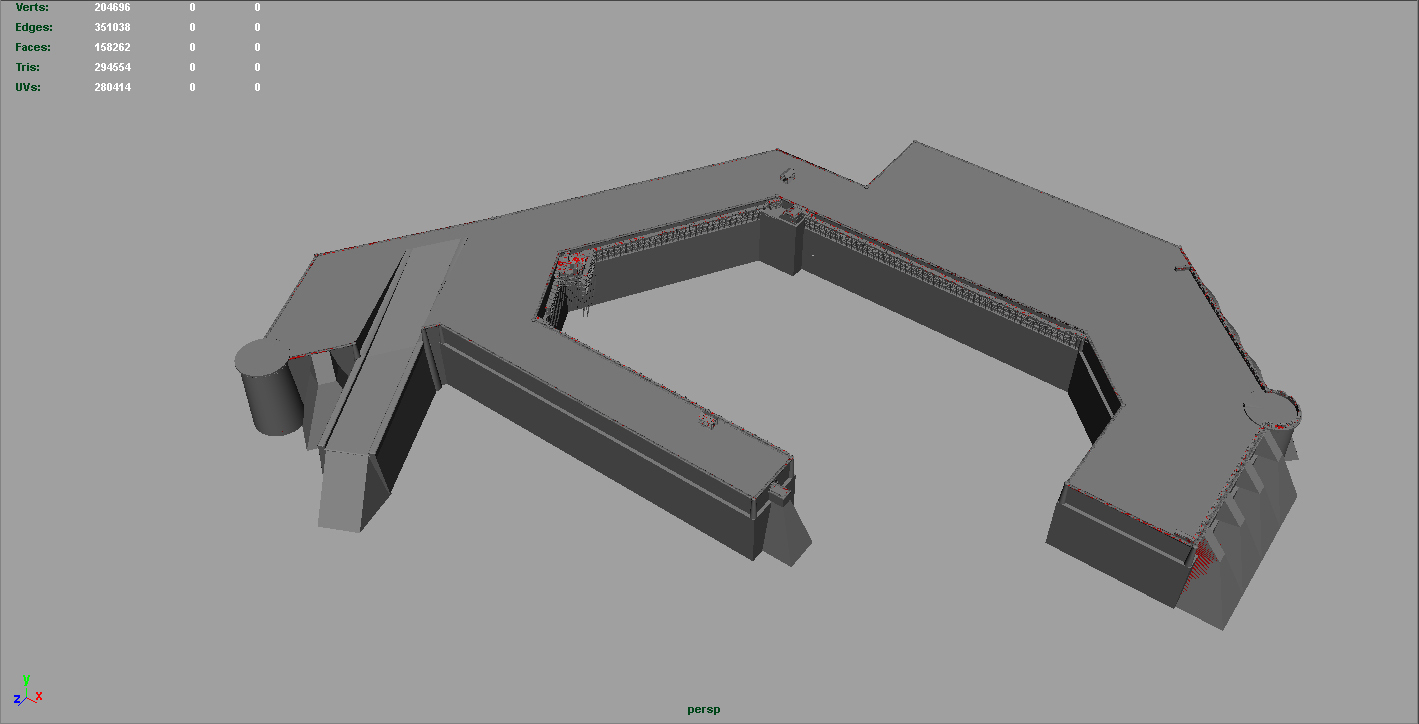
Here the same hierarchy but with only one open group:
PICTURE:
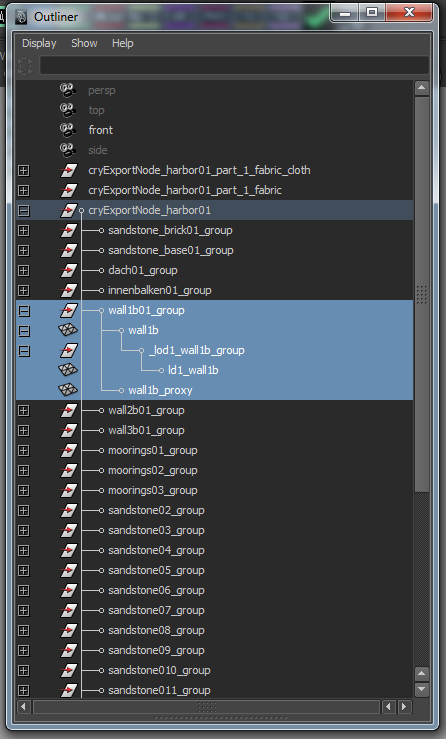
Please look now more closely at my screenshots. For the best LOD use and compensation of big polycounts at big objects (in size), I have setup the harbor in many small units, you see as the groups (submodells). The benefit is a fast switch of the LOD stages in the units far away from players positon. Again: Although the harbos as whole modell is big, an good submodell setup allows the switching of LODs inside each unit, independent to all other units below the CryExportNode. Remember: Each of this units I have setup alone as group below the whole cryexportnode.
When you take a look at the highlighted "wall01_group" you see, that this group (unit) contains the LOD and proxy for specially this group. I have repeated this with all parts and setup this way the groups as autark units inside the exportgroup. The LOD switching and proxys I have tested and all works as I want. The biggest benefit is to combine this way large polycounts too. The only one border you need to mention is the 32 submaterials thing in the MTL per modell. When you reach it, you need to setup a next CryExportNode.
The harbors dimension is 396 x 321 x 40m. In calculation of LOD ranges and its dependence of size made it necessary to decompose it in so small units that the LODs are working when walking the harbor. You can test this easy ingame when you walk it and the other side of the pier have LOD1.
Screenshots in detail below!
1. The hierarchy is long but its worth to set every unit in one group:
PICTURE:

2. This color coded layersetup in Maya shows hopefully the setup of units. Its a small overview because the smaller parts you cant real good focus at the screenshot.
For example, the long wall with the embrasures at the right side are setup as 6 units. The "green" is not good to separate the part in detail here.
PICTURE:
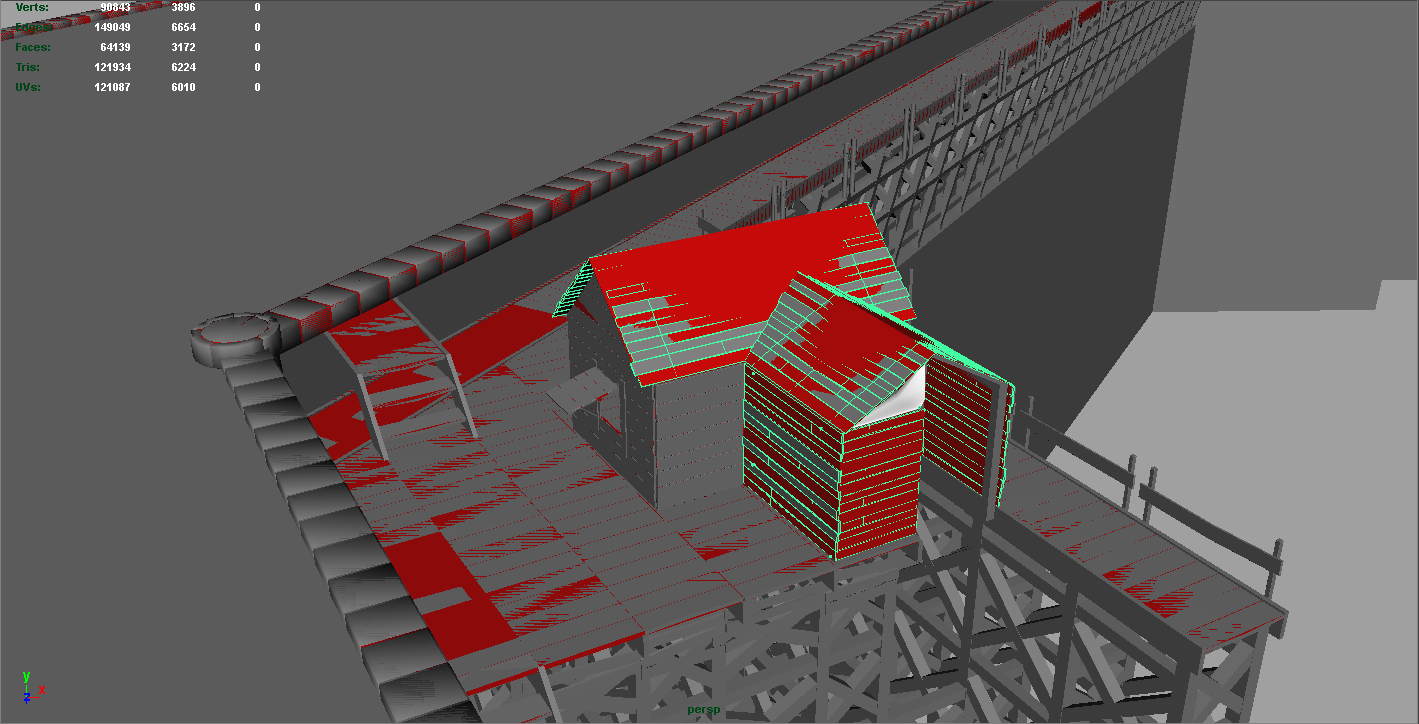
3. Here some examples of setup units:
(I havnt blend of the proxys, so all what you see as "red" is the proxy behind the rendermesh)
The whole harbor has a height of 40m. It was necessary to create all walls at the basement in the same length to ensure its good handling when place in a map from beach side till bigger water depth at the piers.
The right side with the embrasures and the big support walls is the ocean side.
PICTURE:

Last edited: Wedori
-
