• New Horizons on Maelstrom
    Maelstrom New Horizons


    Visit our website www.piratehorizons.com to quickly find download links for the newest versions of our New Horizons mods Beyond New Horizons and Maelstrom New Horizons!

Information aboute The New Pirate Age - Update! [WIP]

1. What do I have to do so that my officers do not have any abilities, but still keep their officer type?
For example: Character "Nami" has all navigator abilities. But I would like to have it none - or at least only one abilitie - but still a navigator remains.
Easiest: Generate the character with level 1. ;)

I know there is also some code to undo all skill/ability assignments, but I do not remember it and can't look it up right now.

You could try adding the "questch" attribute to your characters.
I cannot make any guarantees, but it MAY do what you want.

3.) If I do not give at ch.location.group and ch.location.locator nothing but only at ch.location the place to give, because the Charkter simply so in the place then around?
For example, for Character Lysop (ch.location = "Grand_Cayman_town";) is he just running around in the Grand Cayman town?
You need to place him somewhere, so the locators are NOT optional. They're also quite easy to define, so you might as well do it.

Only exception is that in quest code, it is possible to tell the game to find "a random locator".
But that is vastly more complicated and therefore I am not going to give you any more information on it.
Just define the locators for now.
 
1: Not sure. The levelling system which creates all characters in the game assigns skills and abilities according to the officer type. In theory the line ch.questchar = true; is supposed to prevent that so the character only has exactly what you have assigned in "Story.c", "TempQuest.c" or "TempQuestEnemy.c" (or whichever other file contains the character). In practice, I've used that line for the characters in my "Ardent" storyline and they get some additional abilities anyway, but I'm not too bothered.

2: I can not make any sense out of that question.

3: If the character is to appear in the game from the beginning then ch.location.group and ch.location.locator must be set. The game has to know exactly where to put the character. If you want the character to move around, put LAi_SetCitizenType(ch); in his definition. He will then start on the locator you gave, then walk around randomly.

Here's how to find out which ship model in "Ships_init.c" corresponds to what you see on screen, e.g. "Fast Brig":
  • Look in "RESOURCE\INI\TEXTS\ENGLISH\common.ini" and search for what you saw on screen. For example, you'll find "Fast Brig" on this line:
    Code:
    string = Sloop2,"Fast Brig"
  • Now search "PROGRAM\Ships\Ships_init.c" for any lines which start with refShip.SName and end with what you found on that line, e.g.
    Code:
    refShip.SName           = "Sloop2";
  • Go up to the refShip.Name line for that ship. That is the ship model name. In this case:
    Code:
    refShip.Name           = "HMS_Interceptor";
You probably do not want to use that model for Going Merry because that model is for a very specific ship from the film "Pirates of the Caribbean", and the model has the ship's name on the stern.
interceptor.jpg
 
@ grey Roger
Note 1:
Look at this so are the line!
......
ch.rank = 1;
ch.reputation = "45";
ch.skill.Leadership = "2";
ch.skill.Fencing = "2";
ch.skill.Sailing = "3";
ch.skill.Accuracy = "3";
ch.skill.Cannons = "1";
ch.skill.Grappling = "2";
ch.skill.Repair = "2";
ch.skill.Defence = "3";
ch.skill.Commerce = "0";
ch.skill.Sneak = "3";
ch.money = "0";
ch.quest.help = "0";
ch.quest.dialog = "0";
ch.questchar = true;
LAi_SetStayType(ch);
LAi_group_MoveCharacter(ch, "BRITAIN_CITIZENS");
ch.quest.officertype = OFFIC_TYPE_NAVIGATOR;
ch.HPBonus = 100; // KevAtl 08-26-2007 to correct for game giving low HP
ch.isOfficer = true;
AddGameCharacter(n, ch);

Edit: Note2: Better so:
2.) What I can do is the my character (which are outdoors) not always after which I hired, run away every time. They should make it like the seated characters after which I hired them to stand at the same time. Is it s.Dialog file because I've always used the same thing I take for the seated character, they've always renamed.

Note 3: Hm no it is not the Ship. I can chose the FastBirg ship if play with the Cheat Mode!
 
Last edited:
Here's how to find out which ship model in "Ships_init.c" corresponds to what you see on screen, e.g. "Fast Brig":
I think you can also set some of that DEBUG stuff at the bottom of PROGRAM\globals.c and then the Select Storyline Ship Choice Interface gives that information as well.
If I recall, I added that at some point because I didn't want to bother looking stuff up in ships_init.c myself. ;)
 
Look at this so are the line!
......
ch.rank = 1;
ch.reputation = "45";
ch.skill.Leadership = "2";
ch.skill.Fencing = "2";
ch.skill.Sailing = "3";
ch.skill.Accuracy = "3";
ch.skill.Cannons = "1";
ch.skill.Grappling = "2";
ch.skill.Repair = "2";
ch.skill.Defence = "3";
ch.skill.Commerce = "0";
ch.skill.Sneak = "3";
The Levelling system is so clever that it probably calculates what rank your character should have, based on the total skills you assigned.
Then it auto-assigns a bunch of abilities to match with that character level.
 
@ grey RogerEdit: Note2: Better so:
2.) What I can do is the my character (which are outdoors) not always after which I hired, run away every time. They should make it like the seated characters after which I hired them to stand at the same time. Is it s.Dialog file because I've always used the same thing I take for the seated character, they've always renamed.
I believe you mean the way that, when you hire an officer outside, he then runs off to the nearest door. This is built into the hiring process. When you go to another location, the officer should be with you. (He ought to explain this. He should say "I am ready to follow you in a moment, I must only fetch my dunnage first. I'll meet you behind the next gate.")
Note 3: Hm no it is not the Ship. I can chose the FastBirg ship if play with the Cheat Mode!
You probably don't even need Cheat Mode. "HMS_Interceptor" only has a maximum crew of 44, so it is Tier 7 and you should be able to choose it without cheating.
 
You said "I can chose the FastBirg ship if play with the Cheat Mode!" The Fast Brig is "HMS_Interceptor". The pirate frigate, "PiratFrigateSup", will indeed only appear in Cheat Mode. (There's another pirate frigate, "CrimsonBlood", which will also appear in Cheat Mode.)
 
Hello Guys! @Grey Roger and @Pieter Boelen

Guys all my Officer Character (Crew Members) works well.
So now i can start the Work with the "Pirate Alliance" (Trafalgar D. Law, Red-Hair Shanks and Silvers Rayleigh).
Trafalgar D. Law and Red-Hair Shanks should be follow me with there Ship. Is there a Code for this or Is in a storyline a dialog file for that I can copy as a template?

@Grey Roger
:( Sorry Grey Roger You had right, it is the HMS_Interceptor the Fast Birg.
A question: Say I can copy the HMS_Interceptor orders and all HMS_Interceptor files and rename them to a new pirate ship.
Because I would gladly adapt the ship's hull to the PiratFrigateSup and make normal masts, so no black.
Remove the inscription at the back and place the skull logo of the PiratFrigateSup.

@Pieter Boelen and @Grey Roger
A other Question: Can tell me is there the Frigate Ship Model from AOP2: COAS?
 
Last edited:
"HMS_Interceptor" is a relatively easy ship to modify because it only really uses one texture file, "RESOURCE\Textures\Ships\Interceptor.tga.tx". Copy and change that the same way you did with character texture files - use TX Convertor to convert .tga.tx to .tga, edit .tga with Photoshop, then use TX Convertor to convert the edited version back to .tga.tx format. The new texture file name must be the same length as "Interceptor". Abbreviate it or pad it out with "_" to make it the right length.

You will also need to copy and rename the entire folder "RESOURCE\MODELS\Ships\HMS_Interceptor". You also need to rename all the files in that new folder - for example, if you're calling the new ship "Pirate_Interceptor" then all the files need to be renamed to "Pirate_Interceptor.gm", "Pirate_Interceptor_mast1.gm", etc. The folder and .gm file names do not need to be the same length as the original, you can call them whatever you like, but they must all match each other.

Use Hex Editor to edit "Pirate_Interceptor.gm" (or whatever you called it). Find "Interceptor.tga" and change it to whatever you called the texture file, exactly as you've done for character models.

Now use GM Viewer to look at your new ship's hull and see how it will appear. You may need to edit and convert the .tga file a few times until the hull looks the way you want it.

Edit "PROGRAM\Ships\Ships_init.c". Copy the entire block for "HMS_Interceptor" and change the copy to match "Pirate_Interceptor" (or whatever you called it). The only lines you really need to change are refShip.Name (must match the new ship model and folder name), refShip.england (change that to 0.0, this is not a British naval ship) and refShip.pirate (change that to 1.0, it is a pirate ship).

Edit "RESOURCE\INI\INTERFACES\pictures.ini". Find the line for "HMS_Interceptor", copy it, and change the copy to "Pirate_Interceptor" (or whatever you called it). Do not change the numbers. That way your ship will use the same interface picture as the original, which saves you the effort of having to create a new one. (Someone already did the same thing for "SP_BattleGalleon". A pirate version, "PiratBattleGalleon", has a copy of the line for "SP_BattleGalleon", so the pirate version uses the same interface picture as the Spanish version.)

Edit "RESOURCE\INI\TEXTS\ENGLISH\ShipModels_descriptions.txt". Add an entry for your new ship - you may as well find the entry for "HMS_Interceptor" and put yours near it, as it's a similar ship, though it doesn't really matter where you put your entry as long as it is in there somewhere.

A other Question: Can tell me is there the Frigate Ship Model from AOP2: COAS?
No, that ship is not included in "Pirates of the Caribbean". It doesn't even look like a frigate. Some of the pinnaces, especially "SP_Pinnace50", look a bit like that ship.
 
Ok Thanks!

Can you help me with that?
So now i can start the Work with the "Pirate Alliance" (Trafalgar D. Law, Red-Hair Shanks and Silvers Rayleigh).
Trafalgar D. Law and Red-Hair Shanks should be follow me with there Ship. Is there a Code for this or Is in a storyline a dialog file for that I can copy as a template?
 
Mary Wood is a hireable companion (as opposed to officer).
She has this additional stuff in her character init entry:
Code:
    ch.Ship.Name = "Morning Star";
    ch.Ship.Type = "Brigantina1";
    ch.Ship.Cannons.Type = CANNON_TYPE_CULVERINE_LBS24;
    ch.ship.cargo.goods.BALLS = 1000;
    ch.ship.cargo.goods.GRAPES = 500;
    ch.ship.cargo.goods.KNIPPELS = 500;
    ch.Ship.Stopped = true;
 
For the ship, as usual, if you want the pirate version then you'll need to do it yourself. You could convert "bortoutfrigatep.tga.tx" and possibly "13CrimsonBlood50.tga.tx" to .tga as well, load them into Photoshop, and try copying bits of them into your modified "Interceptor" texture.

You can assign a ship to a character in his definition in "TempQuest.c", "Story.c" or wherever you've put him. Add lines like this:
Code:
    ch.Ship.Name = "Justinian";
   ch.Ship.Type = "HMS_Bellona";
   ch.Ship.Stopped = true;
Those lines are from Captain Keene's definition in the "Hornblower" storyline. Change the name and ship type to whatever you want for Trafalgar D. Law and Red-Hair Shanks.

In the storyline "quests_reaction.c", the command to have their ships join you is:
Code:
SetCompanionIndex(PChar, 1, GetCharacterIndex("Trafalgar D. Law"));
SetCompanionIndex(PChar, 2, GetCharacterIndex("Red-Hair Shanks"));
Replace "Trafalgar D. Law" and "Red-Hair Shanks" with whatever ID you gave them in "Story.c", "TempQuest.c" or wherever you defined them. The numbers 1 and 2 refer to their slots in your fleet - where they will appear in your list of ships if you press F2 and then click "Ships". (You can also use -1 for both. That assigns the ship automatically to any slot which does not already have a ship in it.)
 
Mary Wood is a hireable companion (as opposed to officer).
She has this additional stuff in her character init entry:
Code:
    ch.Ship.Name = "Morning Star";
    ch.Ship.Type = "Brigantina1";
    ch.Ship.Cannons.Type = CANNON_TYPE_CULVERINE_LBS24;
    ch.ship.cargo.goods.BALLS = 1000;
    ch.ship.cargo.goods.GRAPES = 500;
    ch.ship.cargo.goods.KNIPPELS = 500;
    ch.Ship.Stopped = true;
I don't think you need to suppy the cargo. If you do, you'd better add some food and rum as well. But I haven't seen those lines in other definitions for characters with ships.

Will "CANNON_TYPE_CULVERINE_LBS24" work with the "USE_REAL_CANNONS" toggle enabled, as it is by default?
 
I don't think you need to suppy the cargo. If you do, you'd better add some food and rum as well. But I haven't seen those lines in other definitions for characters with ships.

Will "CANNON_TYPE_CULVERINE_LBS24" work with the "USE_REAL_CANNONS" toggle enabled, as it is by default?
I have absolutely no clue. I just remembered Mary Wood is a hireable companion and copied that stuff from her character init entry.
Indeed it doesn't make a whole lot of sense, but it is what is there. :confused:
 
@Grey Roger
Hi..
:( i have Problem to make the blue blanks of the HMS_Interceptor into black wood Blanks without loseing the Structure of the wood.

For the first time I use the blue wood blankS, but if only one can change it for me into Black / Grey(Colorcode:#333333) it would be fine.

Cu.
 
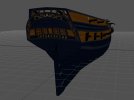
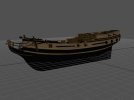
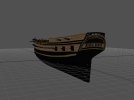
Indeed, black does not lend itself well to shadowed textures, which is why you don't see much texture on the black stripes of the various "HMS_..." and "RN_..." models of British ships in the "Revolutions" and "Napoleonic" periods. So this is what I have so far:
development1.jpg development2.jpg
The blue and dark yellow scheme is replaced by the black and pale cream standard Royal Navy scheme, and the name is gone.

But now I have a Photoshop file with the blue, light grey and yellow parts separated out (blue changed to black, yellow changed to pale cream, light grey also changed to pale cream for this version). The hard part was separating out those bits. Now I can change the colours again to anything you want. My suggestion would be, instead of grey, change the dark blue to dark brown to look like wood. Then decide what colour you want the light grey and dark yellow areas to be in your version.
 
Back
Top